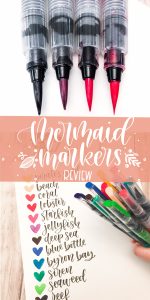
Water brushes are such a fun tool to use for brush letter calligraphy. The chambers of these brushes are usually filled with water and dipped into ink or watercolors for lettering. These Jane Davenport Mermaid Markers take water brushes up a notch by pre-filling them with an assortment of fun colors. This review will go over how to use these pens as well as demonstrate some of their uses like making some galaxy lettering.
Things to know about Jane Davenport Mermaid Markers:
- Original price for these pens is $40, but its available on Amazon for less than $30
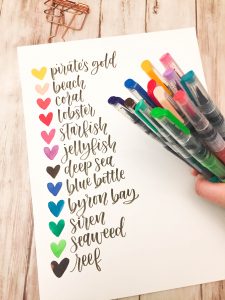
- The set comes with 12 markers in assorted colors (see above for all colors and their fun names)
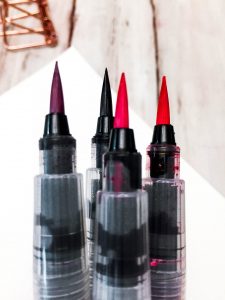
- The tips are made of nylon
- The inks are dye-based and not light fast
Pros
- These tips come to a fine point which means you can get really thin hairlines.
- The brush tip is very thick which means you can also get really thick downstrokes.
- There is a nice flex to the tip, which means that the bristles bounce back easily.
- The colors are really beautiful (and come with really cute names).
- Ink flow through the pens is great so they always write like other “juicy” pens.
- These inks are water soluble and water reactive.
- These pre-filled pens are easy to travel. This eliminates the need to carry additional paints or inks.
Cons
- Bristle brush tips are more flexible than felt brush tips, so these markers might take some getting used to if you’re accustomed to felt tipped brush pens.
- Bristle brush tips require more hand control to maintain consistency between thin and thick strokes.
- Dye-based inks are NOT light fast, which means that colors will fade over time and not a great ink to use for works that will be hung somewhere near sunlight.
- These inks are slightly more difficult to blend compared to water and watercolor paints. These inks tend to dry a lot faster because they are dye-based.
- In order to blend inks, you will have to use watercolor paper since regular paper will absorb the ink quickly.
Now for the fun part, what can you do with these pens?
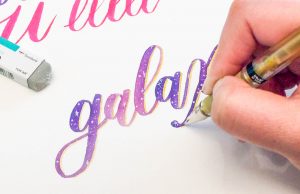
Galaxy Lettering
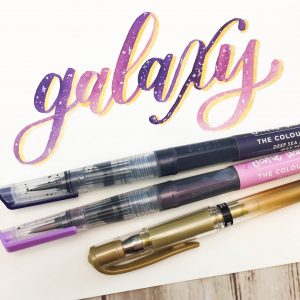
Galaxy writing is a fun and super easy way to embellish your letters. It requires you to bleed and blend some colors together. My favorite combo is this dark purple, purple, and pink mixture. Add some stars and you’re pretty much done.
What you’ll need:
- Mermaid markers in Jellyfish and Deep Sea colors
- Canson XL Watercolor paper
- Uniball Signo Gel Pen in White
- Uniball Signo Gel Pen in Gold
Step 1: Understanding blends and bleeds
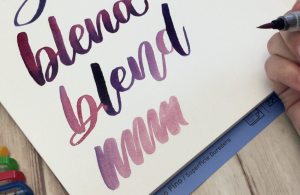
A blend is where the color gradient transitions smoothly from one color to another. A bleed, however, is when one color seeps into another color and the change between colors is very distinct. The above written “blend” is a true blend and the second “blend” actually is a series of bleeds with the most obvious bleed from between the “b” and “l”.
The great thing about these markers is that they are “self cleaning”, meaning that if you dip the tip of your pen in one color, it will pick up that color but eventually return to its original color. To begin galaxy writing, we will be doing a series of bleeds using just two colors.
Step 2: Begin writing in brush lettering calligraphy
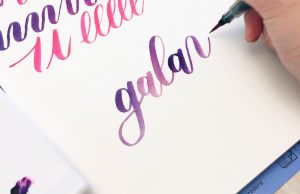
Now, begin writing your word or phrase. Dip the Jellyfish color pen into ink from the Deep Sea marker will give us a variety of colors in between. You can pool some of the Deep Sea marker ink by squeezing on the chamber of the pen and letting a few drops of ink sit on a non-porous surface (like plastic containers or plastic sandwich bags). This effect works best by dipping the lighter color pen into the darker color ink. Depending on the colors, if you do the reverse, the colors from the lighter color ink may not show up. I usually like to stick to colors from the same family, like the light purple with the dark indigo. If you mix colors that are complementary, like red with green, you will end up with a brownish color. It takes some experimenting to see which colors will blend well together.
Maintain the thick downstrokes by applying more pressure on your marker. This will make more of the pen tip make contact with the paper. Continue making thin lines with your upstrokes by releasing pressure. Most people find this the hardest part since it requires a great deal of hand control. It takes practice to be able to these strokes evenly and consistently. For more practice, download a copy of my brush lettering beginner’s stroke guide.
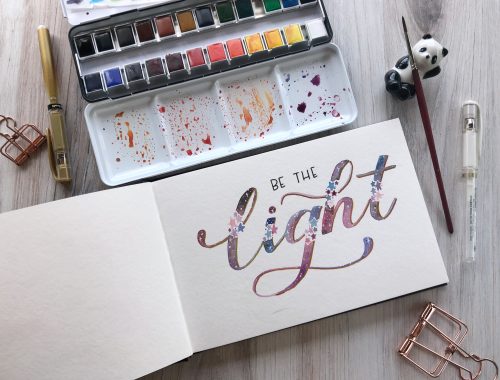
Step 3: Add in the stars with a white gel pen
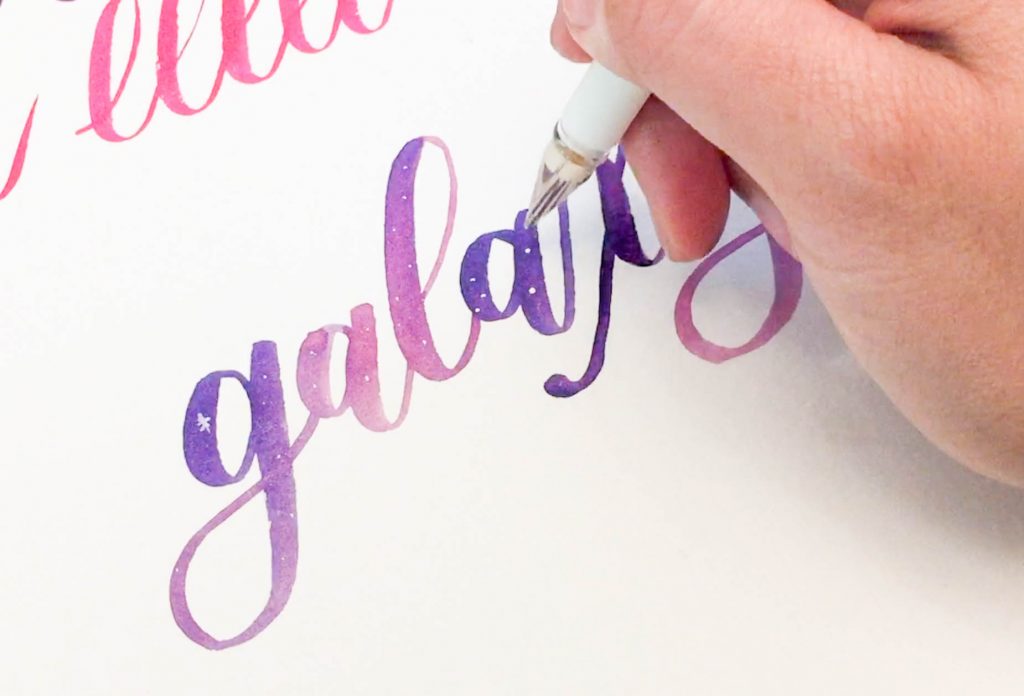
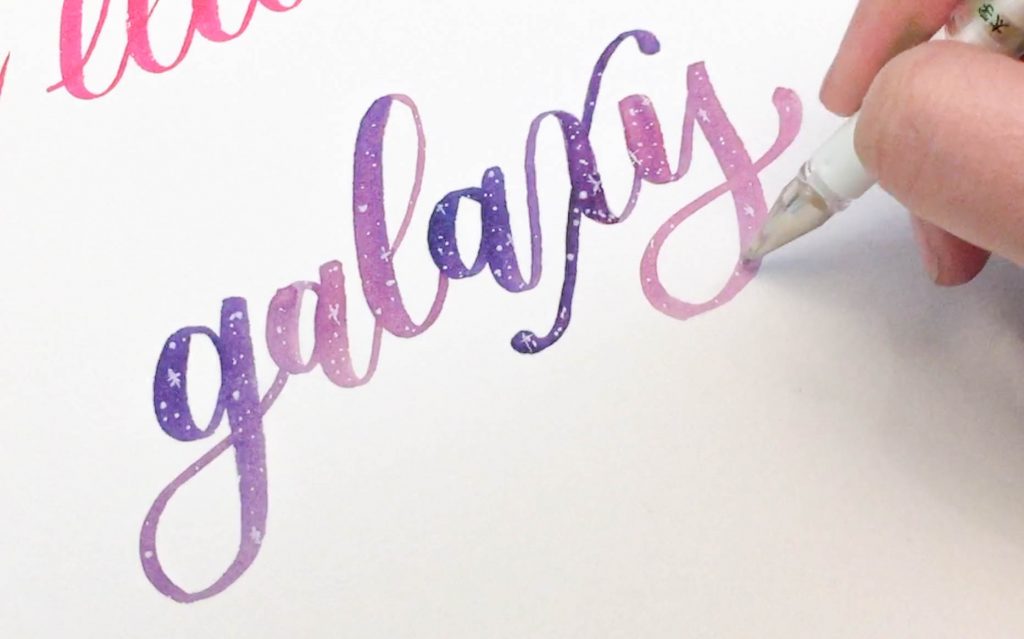
Once your work or phrase is written, use a white gel pen to add dots of varying sizes inside the lettering. You can also add different star shapes to create some more interesting shapes than dots.
Step 4: Create shadowing with a gold gel pen
Finally, add your shadowing to further enhance your lettering. To add a drop shadow, I imagine where a light source would be. Here, I’m using the eraser to show where the light is coming from. I then add the shadow to everything behind where the light would hit. Adding a drop shadow gives your lettering a little more definition and makes the painted portion stand out more.

And that’s all! I hope you play with different color combinations and experiment a little more with these pens. They come in so many vibrant colors and are fairly easy to use. Hope to see all the variations you guys come up with!
2 Comments
Will definitely give it a try 😊 thanks for sharing 😘
Thanks so much! You’re always so sweet and supportive!