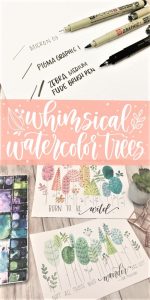
I am absolutely loving the combination of watercolors and line drawings lately. Watercolor is a great way to add vibrant colors to a piece of art and line drawing gives paintings some really cool definition. Here is a simple tutorial on how to make a whimsical watercolor piece with some simple floral line drawing.
Tools I used:
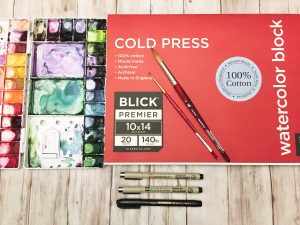
- Blick Premier watercolor block 140 lb cold press
- Watercolors in various colors (I’m using Winsor and Newton Professional Watercolors in tubes that I put into a palette)
- Princeton Velvetouch 3950 watercolor brushes in round 12
- Blicks Master Synthetic watercolor brush in round 10
- Sakura Pigma Micron 05
- Sakura Pigma Graphic 1
- Zebra fude disposable brush pen in medium tip
Step 1: Paint circles, ovals, and triangles
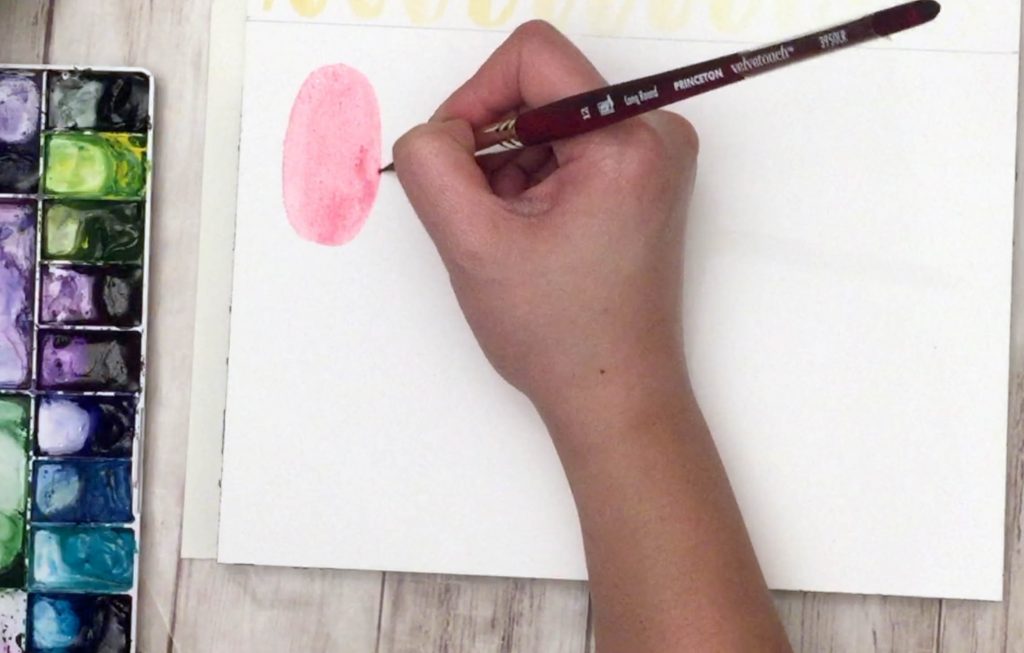
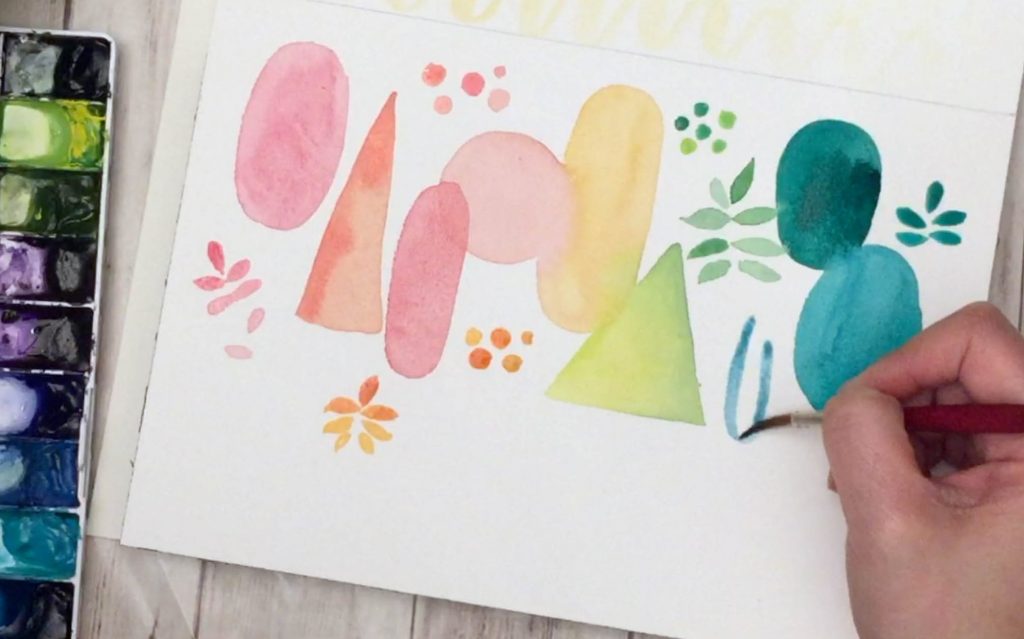
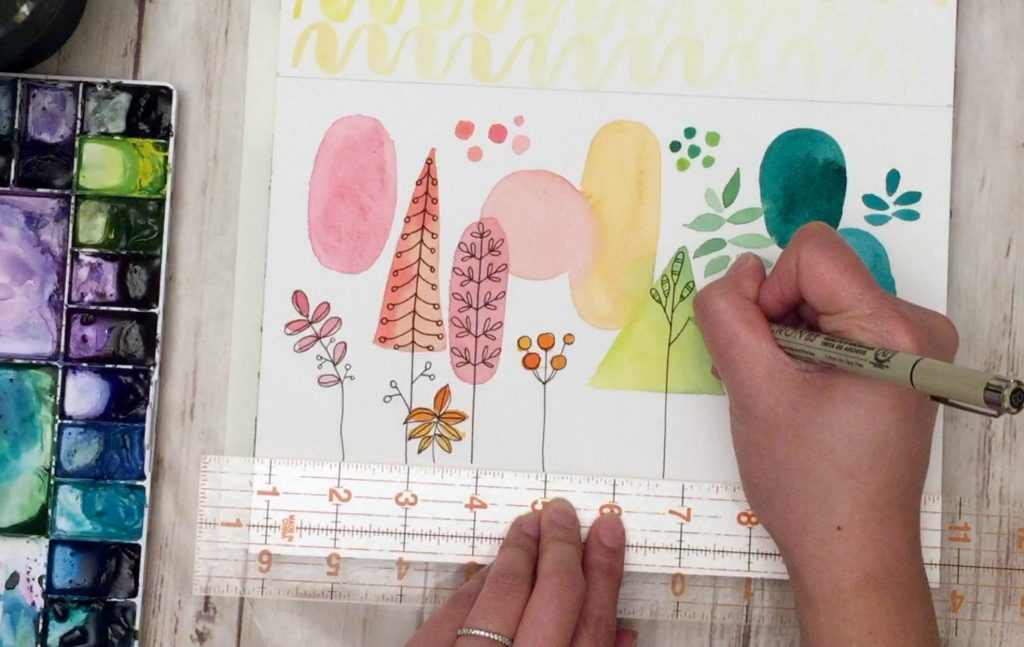
We are going to begin by painting some simple shapes in a variety of colors. Here, I am using a rainbow starting in the red/pink spectrum to the blue/green spectrum. You can choose any set of coordinating colors you want. The painting is going to look extremely abstract at this point. It won’t actually look like anything since we are only painting shapes. Keep the shapes to pretty translucent so you can see the details from the drawings later. Make paint more translucent by adding more water while you’re painting.
You want to create variation and variety in your painting by changing the shapes and sizes. These larger shapes will eventually be the trees that we draw in. Keeping them in different sizes will give your painting some more interesting elements.
Next, you can add on accent shapes like the leaves pattern and clusters of smaller circles.
Some information about the supplies:
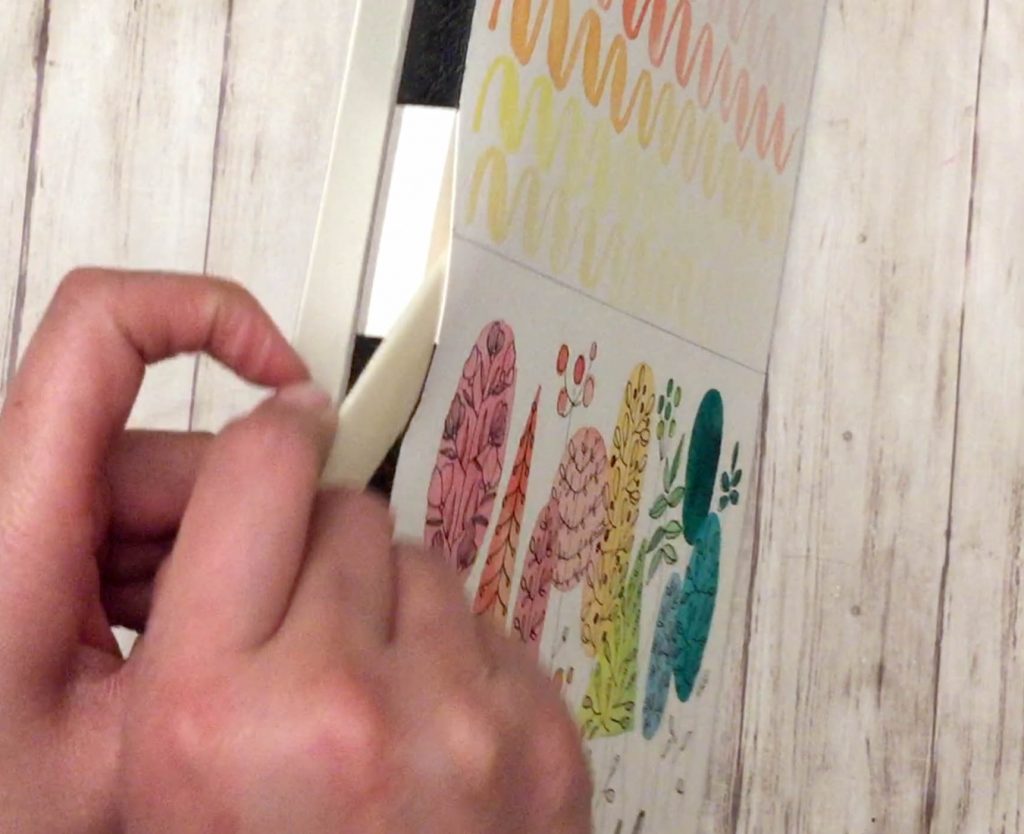
Here, I am using a Blick Premier Watercolor Block in 140 lb cold press. Blocks of watercolor are a convenient and easy way to keep your paintings from warping due to moisture from the water. The ends of blocks are glued together and only come undone once you separate the top sheet from the rest of the block.
Step 2: Draw inside watercolor shapes
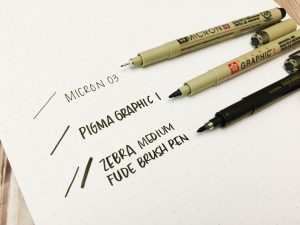
I used the Sakura Micron 03 pen for the drawing of the trees. I decided to use a smaller tip for the drawing portion since you can get a lot more detailing done with finer lines. The Pigma Graphic 1 and Zebra fade brush pen will be used later for the lettering portion.
Micron pens have pigment-based inks that are archival. This means that the color of the inks do not fade over time. Non-archival inks will tend to fade to a brownish color when exposed to light for a long time. More information about Sakura Micron pens can be found at Jetpens.com. This site not only sells pens but offers a huge library of resources about the pens, including ink types and qualities.
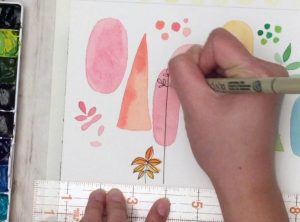
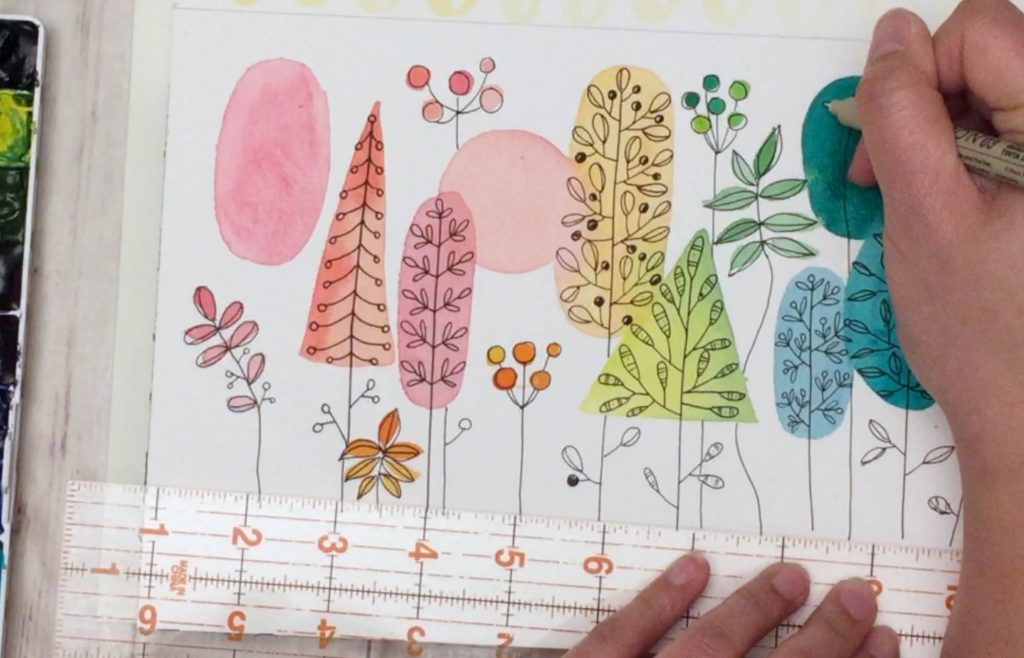
Once the painting is dry, we can start drawing. Make the first mark by drawing a line through the center of the shape. This will be the tree trunk for which you draw leaves and other branches from. I’m using a ruler to prevent my lines from extending unevenly. I also want to keep space at the bottom fo the page for some lettering, which we will get to later.
Once the trunks are drawn in, begin drawing the branches and embellishing them. Here is where we can get really creative with shapes and geometric patterns. I varied each tree to make them all unique and different. Some trees are more elaborate and have whimsical leaves with berries and others just have a single dot at the ends.
Play around with different shapes and come up with new ways to fill the watercolor shapes. You can also add a few of the leaves shape on the branches where there aren’t watercolor. I think this adds a little more fun and whimsical element to the painting.
For the cluster of circles, draw a circle around the painted parts and connect them to one point. Then draw a stem from that point down to the ground.
I’ve included a free guide for a few botanical shapes. It takes time to develop your own shapes and style but I encourage you to make everything your own.
Step 3: Add your lettering
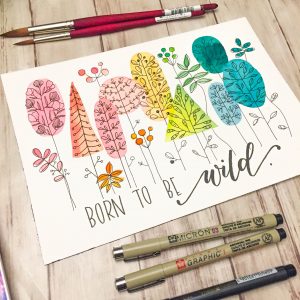
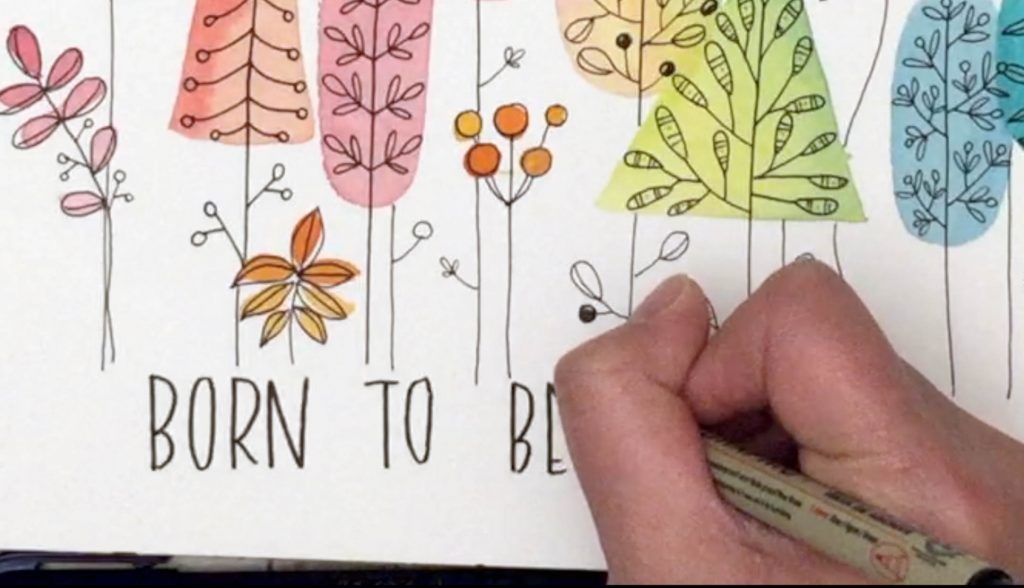
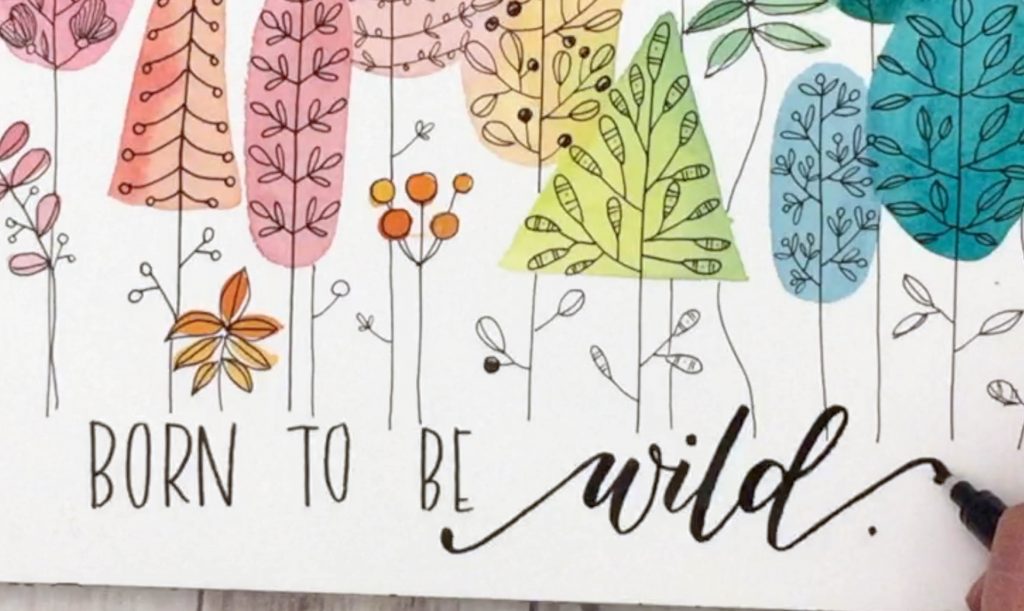
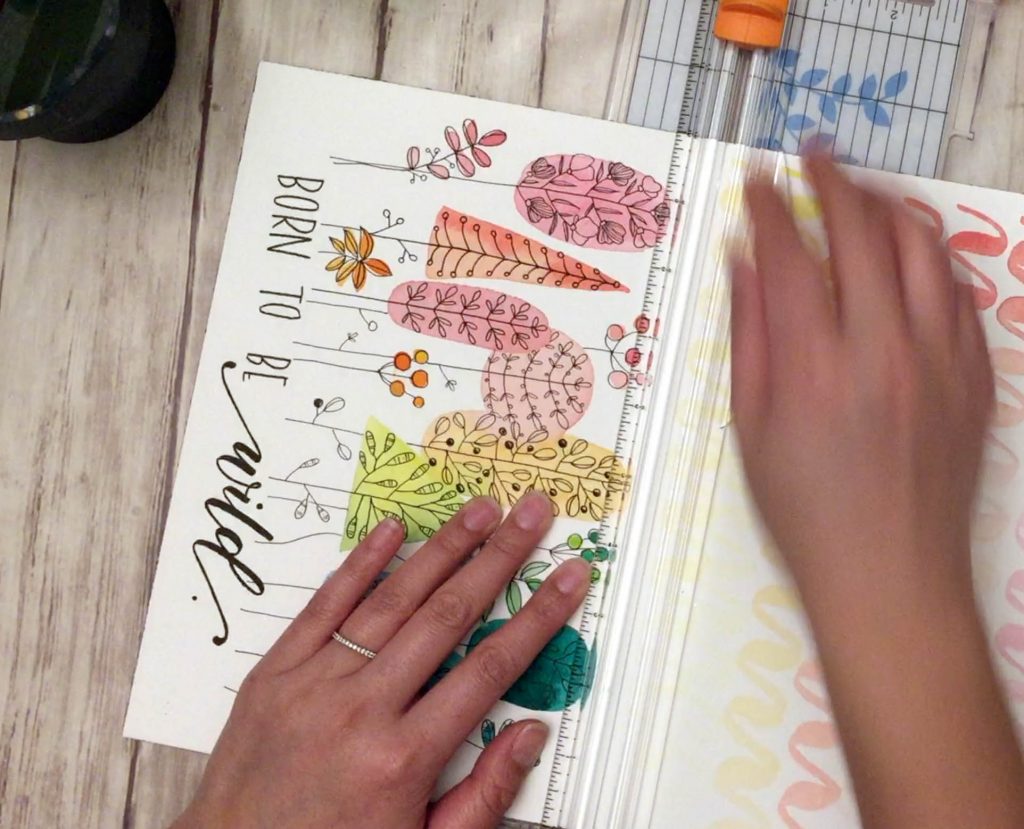
Lastly, we want to add some lettering. Make sure that you leave enough space for yourself to include a phrase a the bottom. These whimsical tree and leaf shapes made me think of the wilderness so I wrote “Born to be wild.” Feel free to choose any phrase or wording you want. The whole point is to have fun with your art.
You can use a pen to sketch ahead of time so you can figure out spacing of your words. Another option, which I prefer, is to write your phrase on a scrap piece of paper first and use it as a guide. I began with a sans serif font written in the Sakura Pigma Graphic 1 pen and ended with a brush calligraphy style in the Zebra fade disposable brush pen in medium.
Step 4: Separate from block and trim (as needed)
This part is optional if you did not use a watercolor block, but since I did, I had to separate the top sheet from the rest of the block. And since I chose to paint on only half of the sheet, I had to use a paper trimmer to size it down.
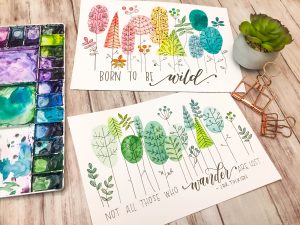

There are so many possibilities to this type of painting and drawing. The combinations are so endless with the types of colors you can use and the different floral patterns you can think up. If you guys give it a try, be sure to tag me so I can see your work!




9 Comments
My goodness Leslie!!! I love this tutorial! Thank you so much for sharing! You’re awesome!!!
Thanks so much for checking it out SheauYunn! So excited to see your work!
Love these cards. I must try it ! So many thanks for this tutorial.
This looks so fun. Thanks for sharing your talent!
I’m so glad you liked it!!
Thank you Leslie, You are very talented and so kind to share your knowledge. I have not been very successful in attempting to draw leaves and flowers in the past. Your method is helping me to improve!!! I will keep practicing. Thank you for the inspiration. I look forward to more tutorials.
Can’t wait to try. Very cool.
Eeks! Right up my alley–thanks for sharing!
I love this tutorial! I know what I’m trying while we are quarantined!