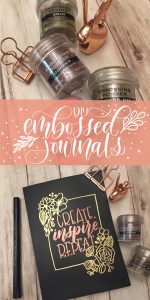
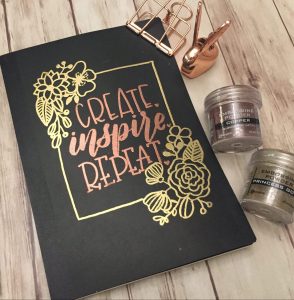
Embossing is so fun and my favorite part is watching the embossing powder melt. What’s more fun than being able to combine embossing with personalize projects in your own drawings and hand lettering? These DIY embossed journals are not only easy to do but really fun to make. The skills you’ll learn from this tutorial can definitely be applied to other projects like embossing gift bags, cards, and personalizing other gifts.
Tools I used:
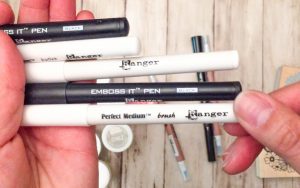
- Ranger Emboss It embossing pens in bullet tip and brush tip
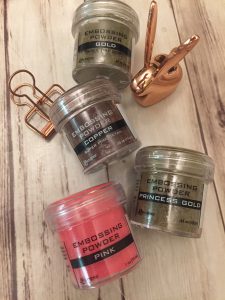
- Ranger embossing powder in princess gold
- Ranger embossing powder in copper
- Journal with a smooth surface
- Embossing heat gun tool
- Brush Round 0
Step 1: Draw a rectangle frame
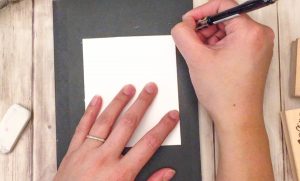
Start by choosing a journal that you want to personalize. It can be almost any kind of journal but should have a really smooth, untextured surface. Having a textured surface will make it difficult for embossing ink to adhere and will be a paint to clean excess embossing powder off of.
Draw a rectangle with a pencil either by using a scrap piece of paper (like I did in the photo above) or just use a ruler to measure out. You want to leave about 1/2 to 1″ borders from the edge of your journal so that you will have enough space to draw your florals.
Step 2: Draw floral design
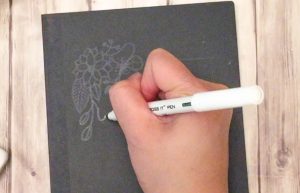
The Ranger Emboss It pen has a slow drying ink which will allow you time to draw before putting embossing powder on. Because it is so slow drying, make sure that you are careful not to smudge the ink while working. This will cause embossing powder to stick to where your smudges are.
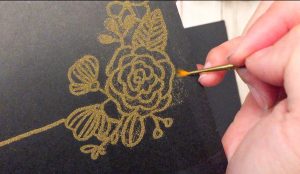
Using your Ranger Emboss it pen in the bullet tip, begin drawing florals in the upper left corner of the frame. Begin by drawing one large flower and a few smaller ones. Then fill in the space by adding leaves. Download my floral drawing guide below if you want some help getting started on floral drawings. Continue drawing flowers on the lower right hand corner. Try creating a different floral design to make the piece more interesting and less symmetrical. Once your floral patterns are done, you can connect them by inking over the rectangular frame that we previously drew.
I’m able to draw my entire floral design and still have the powder to adhere to the ink. I’ve waited 5 to 10 minutes before and the powder will still stick to my ink but this time will vary depending on what embossing pen you choose. I’ve found that the Ranger Emboss It pen works best since it is the slowest drying of the pens I’ve tried. If you draw a little slower, you may want to put powder on after you finish drawing each section. For example, finish drawing the upper left florals and sprinkle the embossing powder on. Then continue to the lower florals and sprinkle powder on. Doing this ensures that the powder can fully stick to your ink if you need more time to draw.
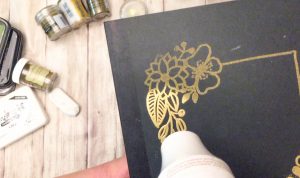
Step 3: Cover the embossing ink in embossing powder
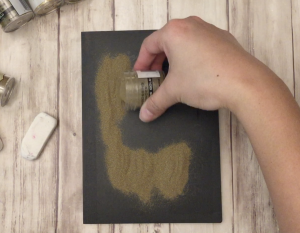
Completely cover the floral drawing and frame in embossing powder. Be sure to sprinkle it on liberally, covering all areas. Pour the excess powder onto another piece of paper and put it back into the jar for future use.
Shake off as much of the excess powder as possible. We will be cleaning up stray powder further in the next step. If you find an area that isn’t covered in powder, you can repeat this process until all of the drawing is covered.
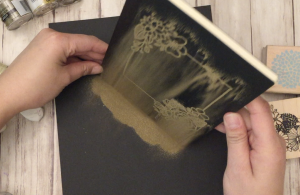
Step 4: Carefully clean off excess powder
Some areas will still have powder even after you have shaken it off. Sometimes this happens if the paper is textured, if the ink has smudged, or if your hand has excess moisture while working. In my case, there was some sticky residue remaining from where the price tag was stuck on the journal.
Use a small brush to carefully wipe down any excess. The powder should lift off easily. Make sure not sure touch the areas where you want the powder to adhere because doing this will also completely remove the powder. You can always repeat the previous step if you’ve accidentally removed powder from an area where you’re supposed to have it.
Step 5: Melt the embossing powder with the embossing tool
Turn the heating tool on and hold it 1″ to 2″ from the embossing powder. Watch for the embossing powder to change color to know when it has properly cured. Hold it in place for just a second after the color has changed to allow it to melt a little further. Holding the embossing heat tool to the powder for too long can cause the powder to singe and bubble. Then the powder will dry flat instead of raised and embossed.
Step 6: Add lettering inside your frame
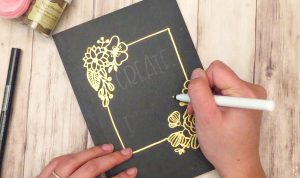
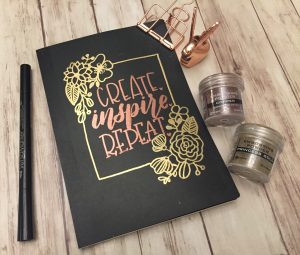
I used a combination of the bullet tip and brush tip pens to create variation in my lettering. It’s entirely up to you what you want to write inside but in this example, I chose to write in a sans serif style, a brush script style, and a serif style. The beauty of these pens is that you can personalize anything you emboss. Instead of relying on stamps to provide the designs, you can really use your imagination to come up with different ways to emboss.
Step 7: Clean up your lettering

Repeat the same process of cleaning your powder off before heat curing it.
Step 8: Melt the embossing powder
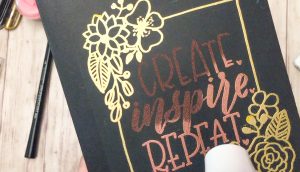
Repeat the process from step 5 and melt the powder from your lettering. Be careful not to overheat the floral parts that you’ve already embossed.
Step 9: Flatten any warped edges (optional)
After applying heat, you may notice that your paper has warped. This is common especially if the paper is thin. Even with thicker paper like this journal cover, the paper will slightly warp. You can easily fix this by putting some heavy books on top of the journal for a few hours.

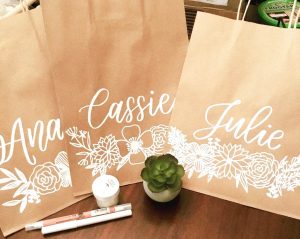
And that’s all! Having these tools open the doors for other DIY projects. I have made little gift bags where you can emboss friends’ names and also embossed my lettering to everything from wood to glass. I hope you guys give it a try. If you’d like me to see your work, please tag me on social media and I’ll try to give you a reply.

1 Comment
This is beautiful! I used to work at Paper Source and fell in love with Heat Embossing! I remember my colleague teaching me how we could emboss the cover of a Moleskine journal, and I was amazed! I currently use a hardcover Leucchturm for bullet journaling, and want to emboss something on the cover. In your experience, will the embossing stand the test of time when being carried around, pulled in and out of bags, etc.?