
Tassels are everywhere nowadays. They’re hanging off of everything from designer bags to fashionable earrings. The old, stuffy image of tassels hanging from old furniture pieces is a thing of the past. They’re so cute and adorable and come in a variety of colors of styles now. Plus, they’re relatively easy to make. So without further ado, here’s a tutorial on how to make your very own DIY tassels.
Here are how to DIY some tassels done two ways — one with ribbon and one with embroidery floss. The tools to make both are pretty similar and so is the method.
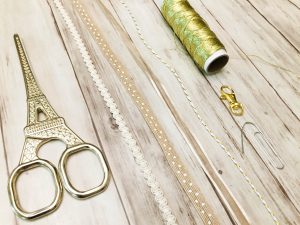
Tools you’ll need:
- Scissors
- Ribbons of your choice OR
- Embroidery floss
- 2-Ply Lame Cord
- Lobster claw clasps key rings
- A paper clip
Ribbon Tassel
Step 1: Pick your ribbons
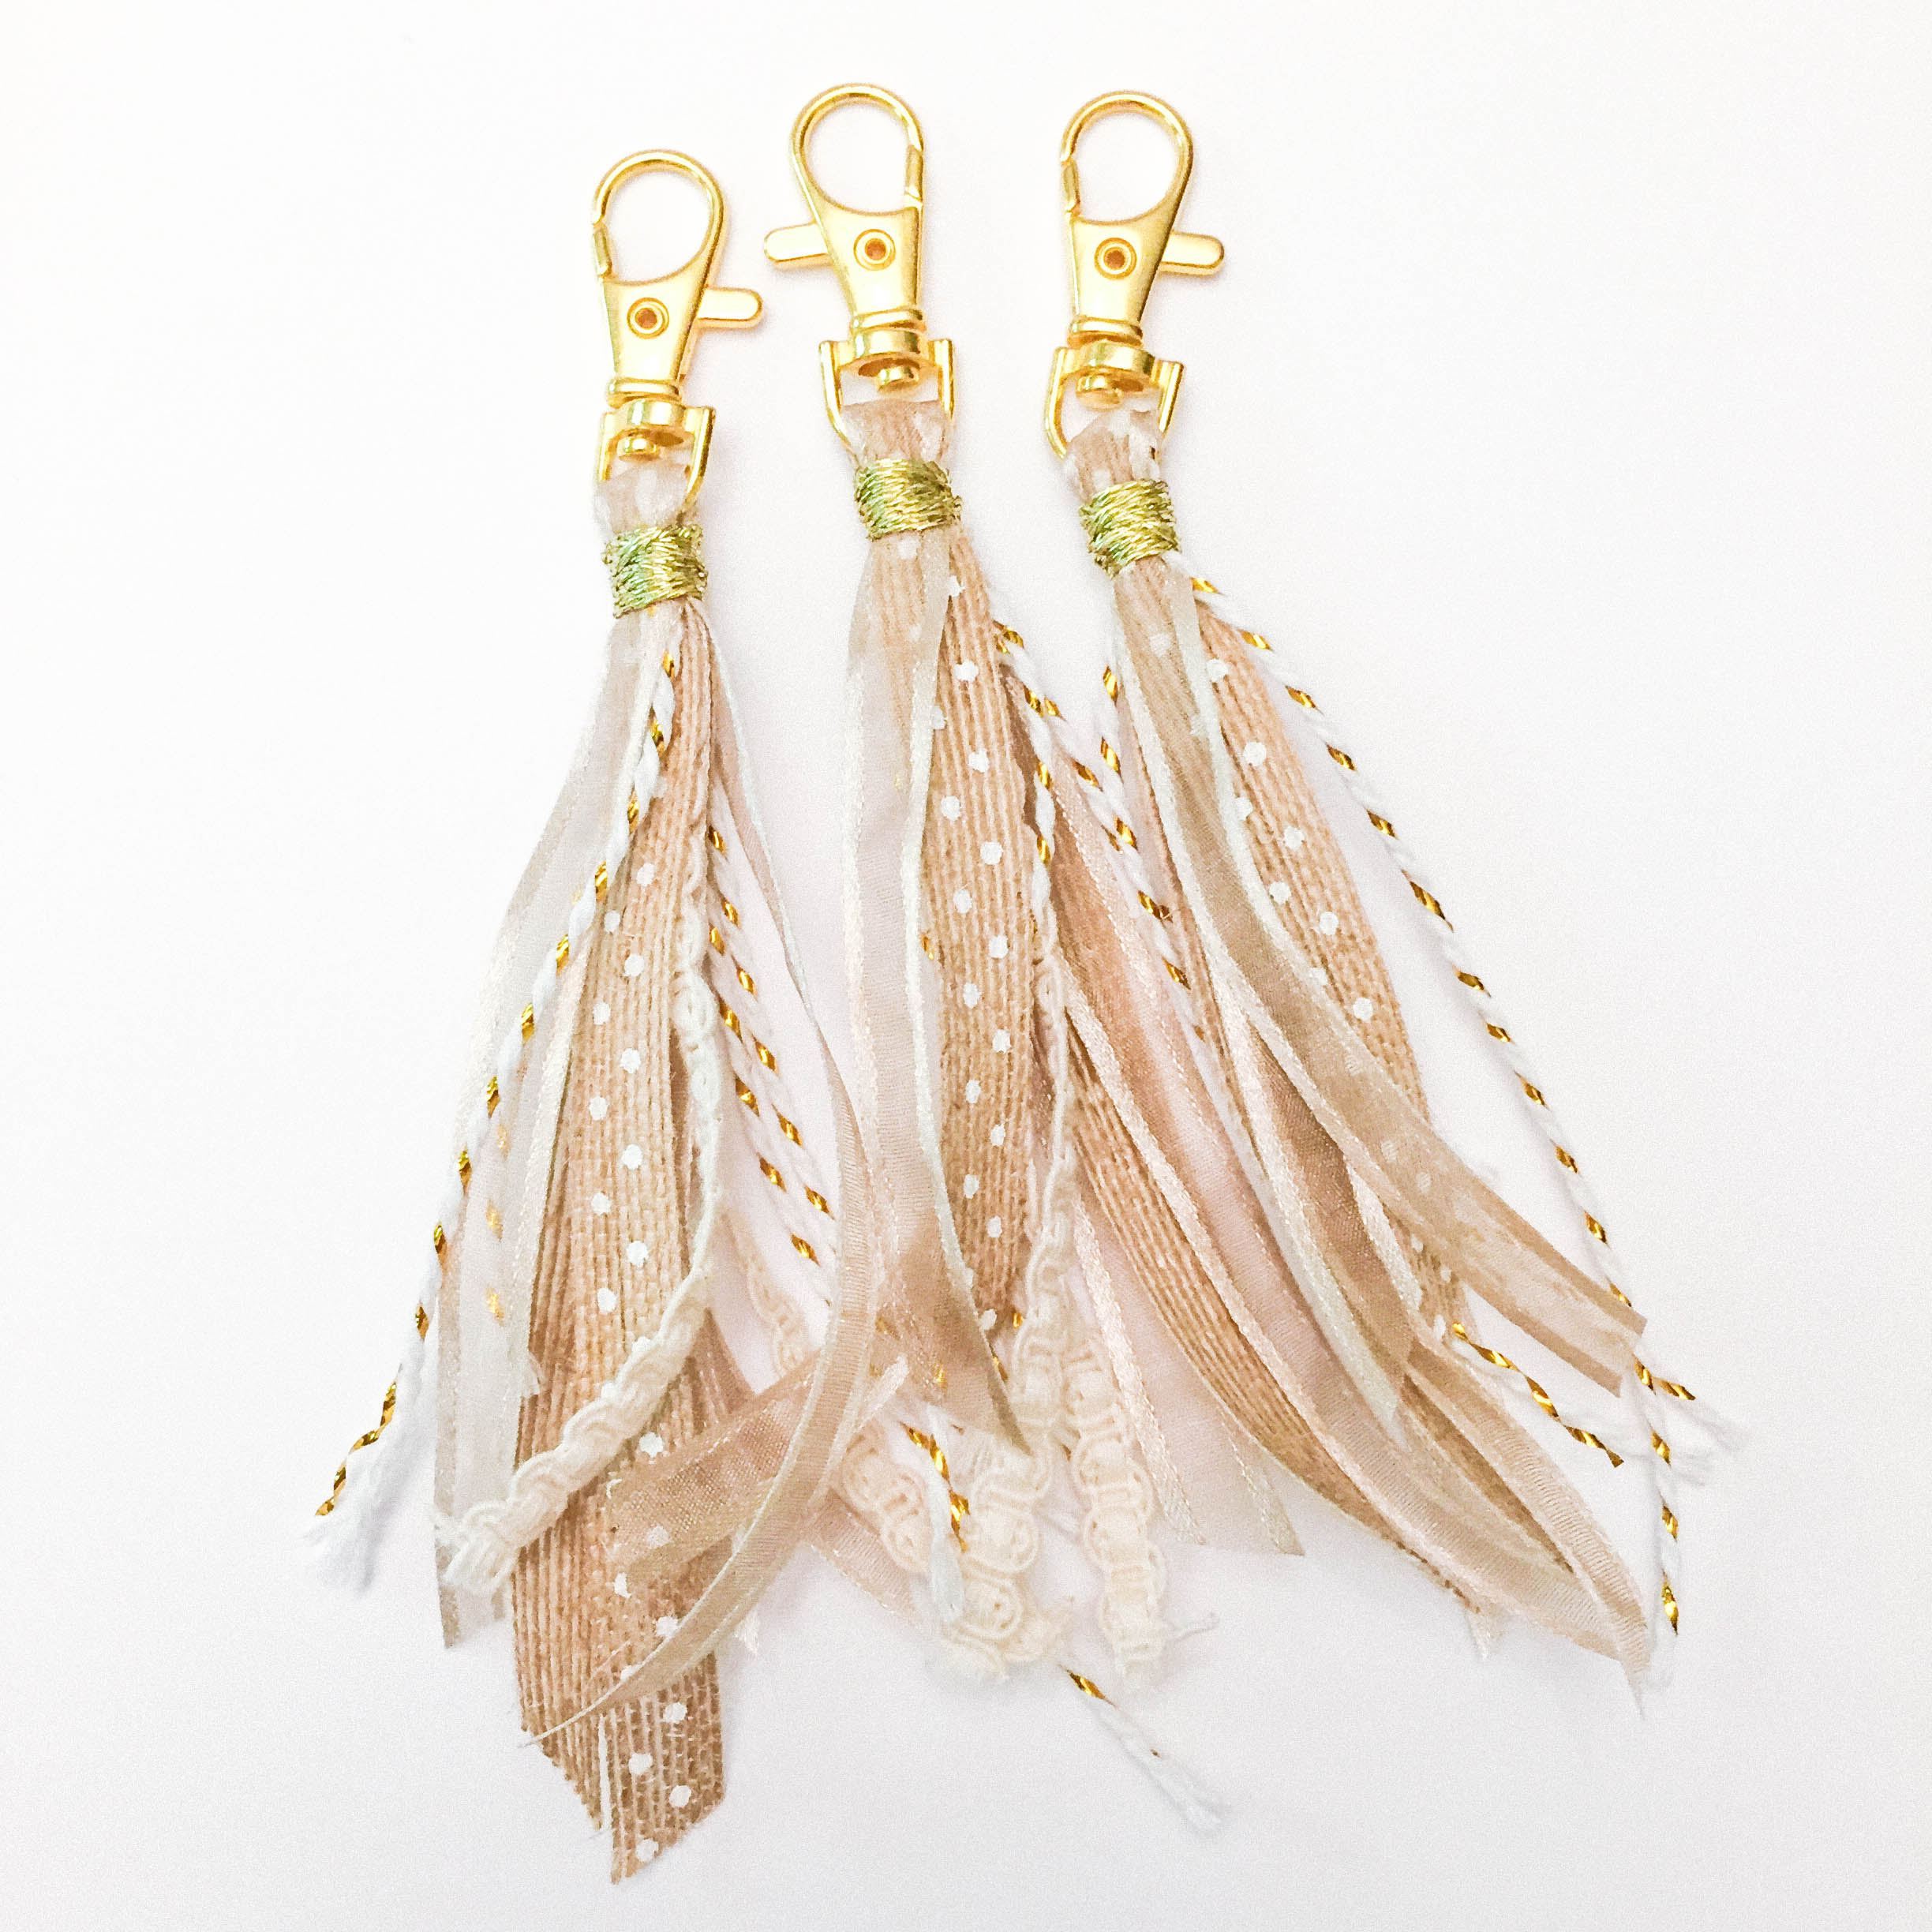
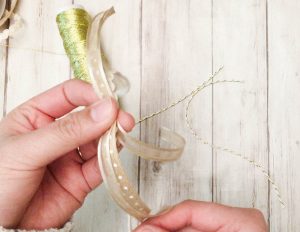
Begin by choosing ribbons in a similar color scheme. The ribbons I chose here are in beige, white, and gold. I added some lace ribbon for a little bit of a vintage feel. I chose ribbons with different textures as well — one from Michaels with a burlap texture, another from Michaels with a sheer texture, and another cord with a woven gold thread.

Step 2: Choose your desired length
I decided to make a tassel with various lengths between 3 to 4 inches. Since we will be folding the ribbons in half, make sure to double the length of the ribbons before cutting them. The ribbons I cut were 6 to 8 inches. After you have the desired number of strands cut, line them all up.
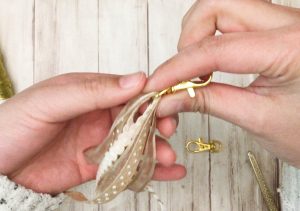
Step 3: Weave the ribbons through the key ring
Gather the ends of the ribbons and weave them through the swivel end of the key ring. Try to position the key ring in the center of all the gathered ribbons. Fold the ribbons over the key ring so we can begin to tie them all together.
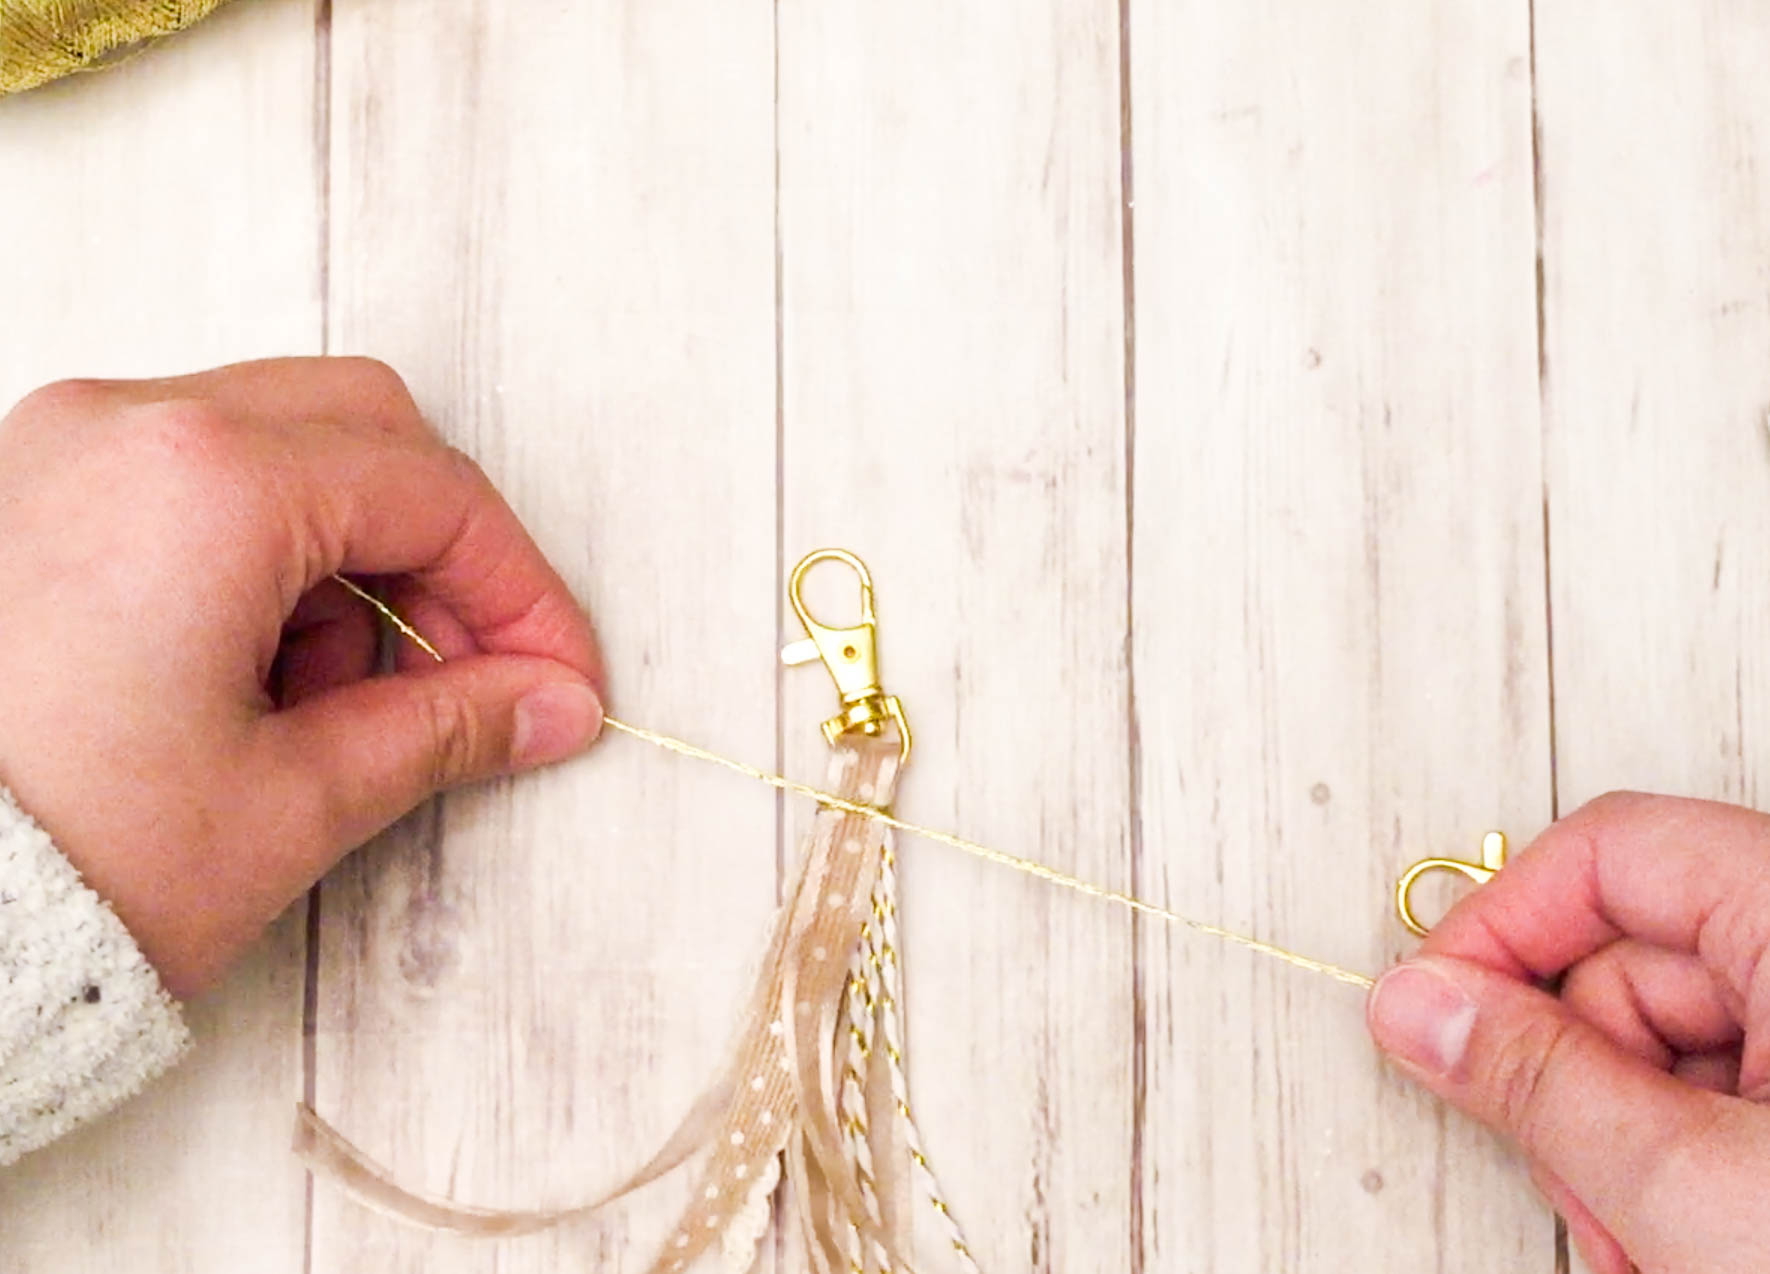
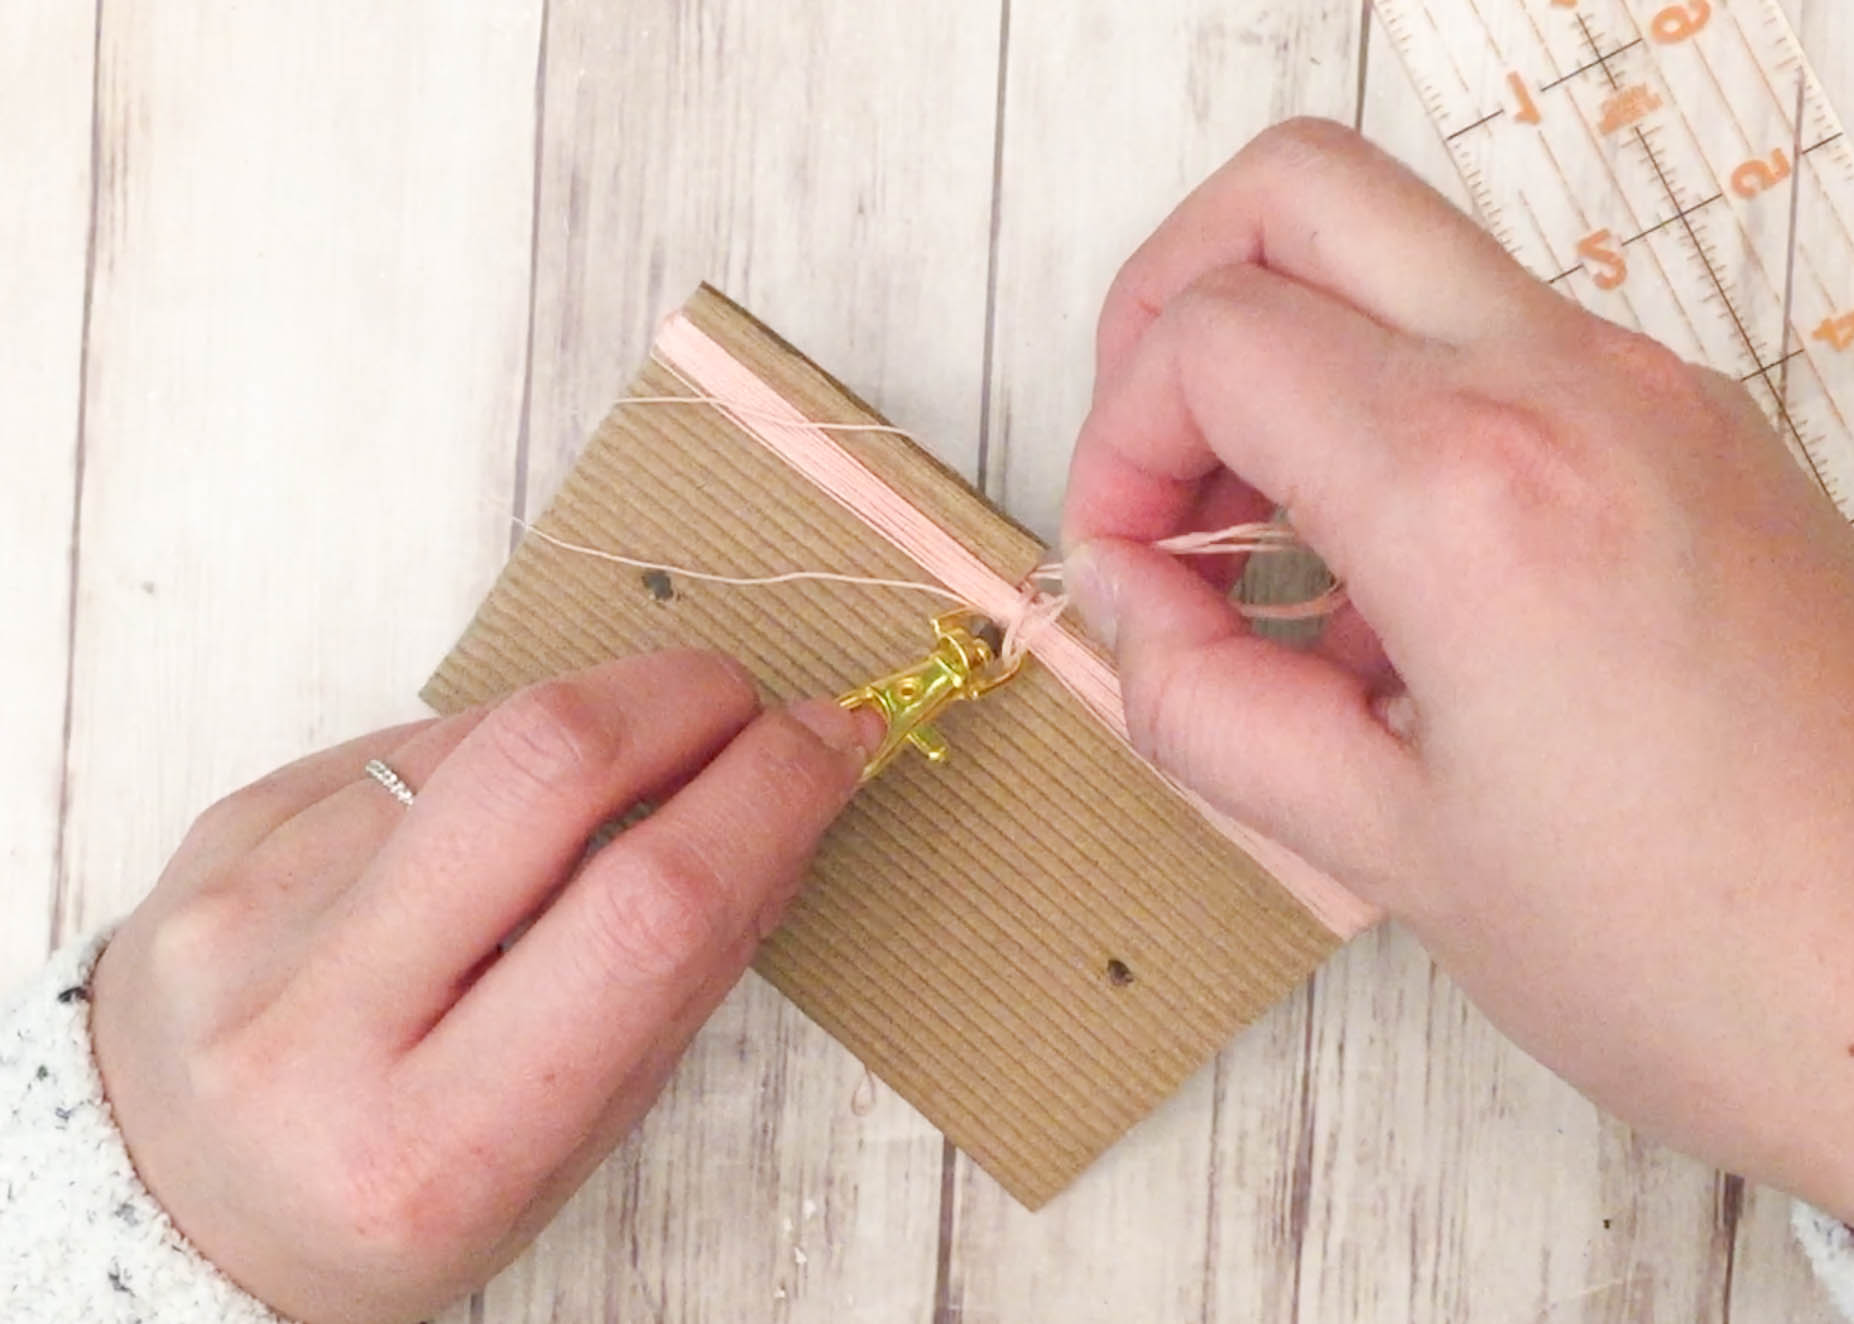
Step 4: Tie the ribbons together with lame cord
Double up on the lame cord about 12 inches in length (so about 24 inches in total). Tie a basic knot (like the first step of tying your shoe). Make sure to tighten so all the ribbons are firmly held together in the knot. Wrap the cord around the ribbon for several turns until you can’t see the ribbon underneath.
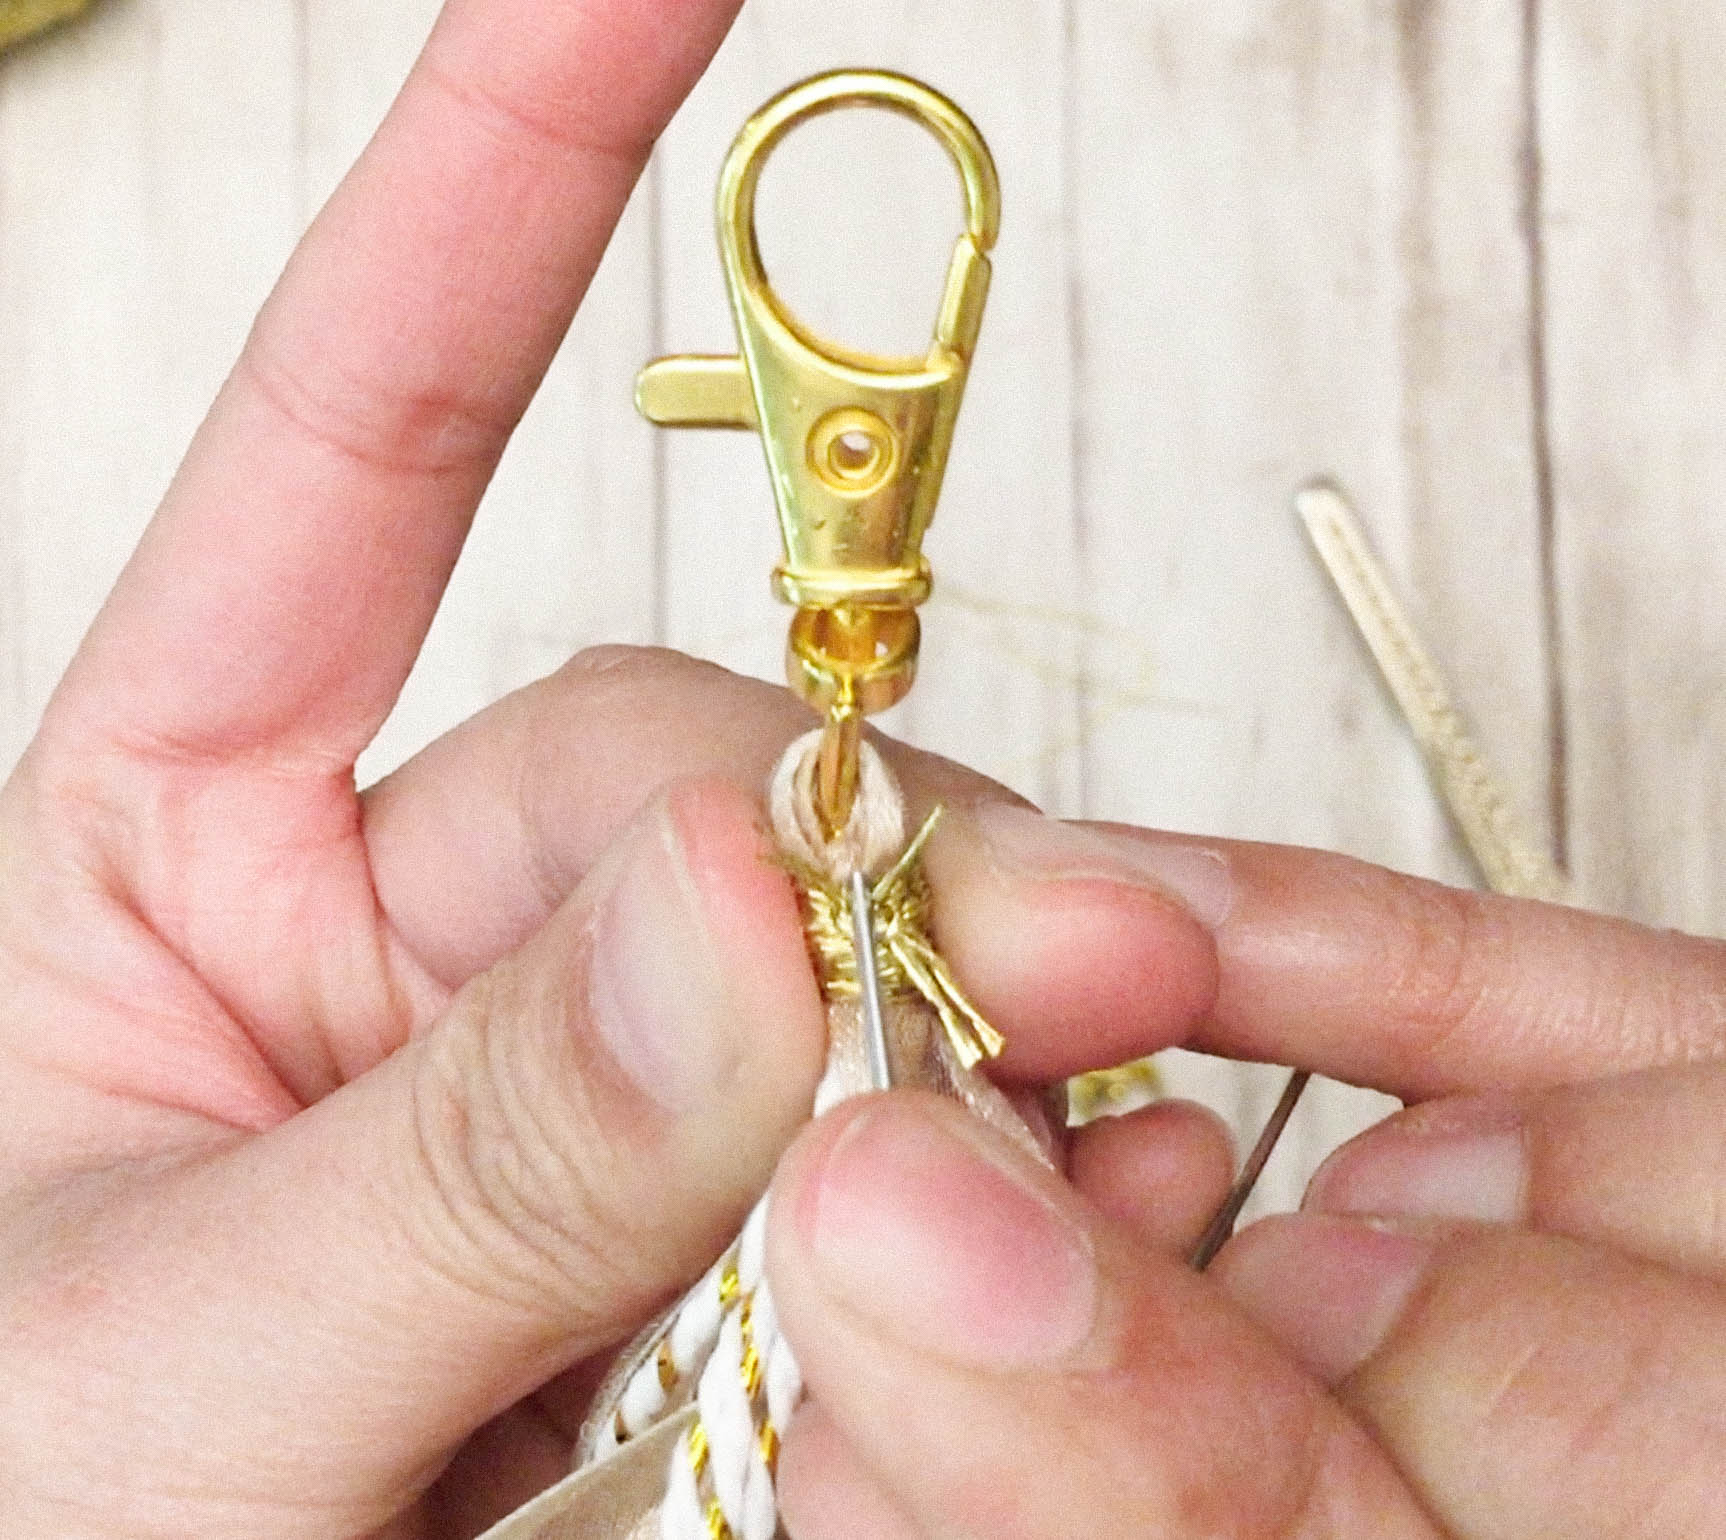
Step 5: Hiding the ends of the lame cord
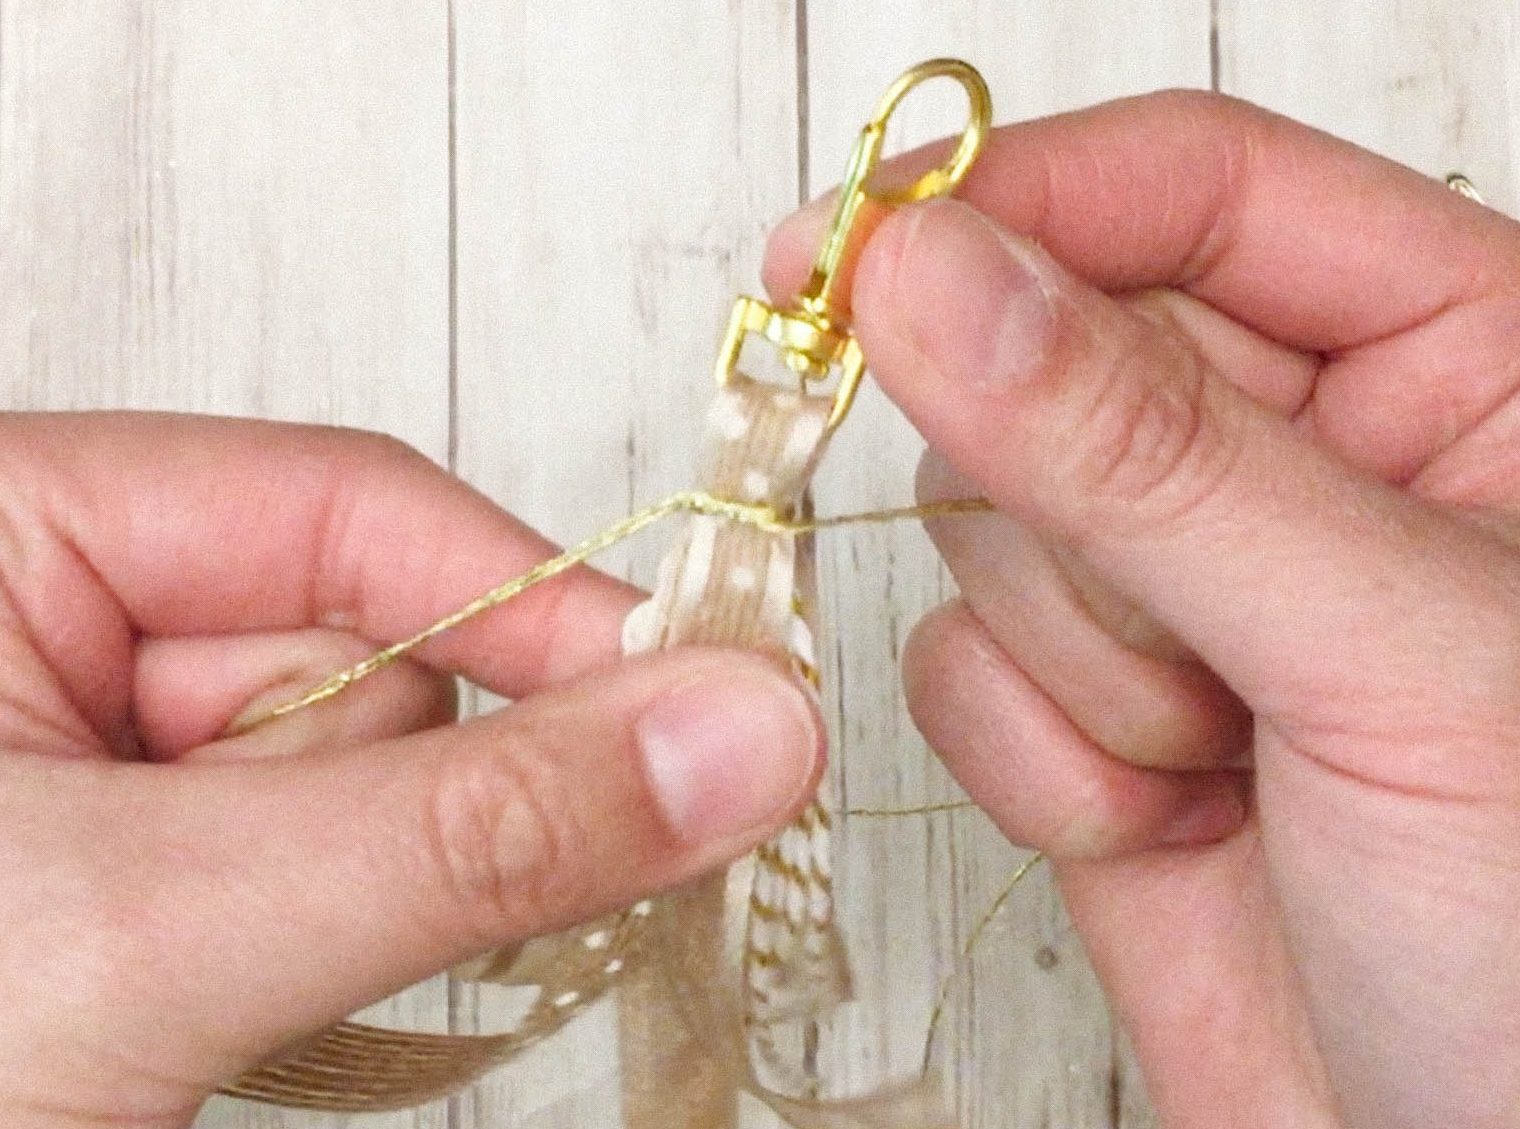
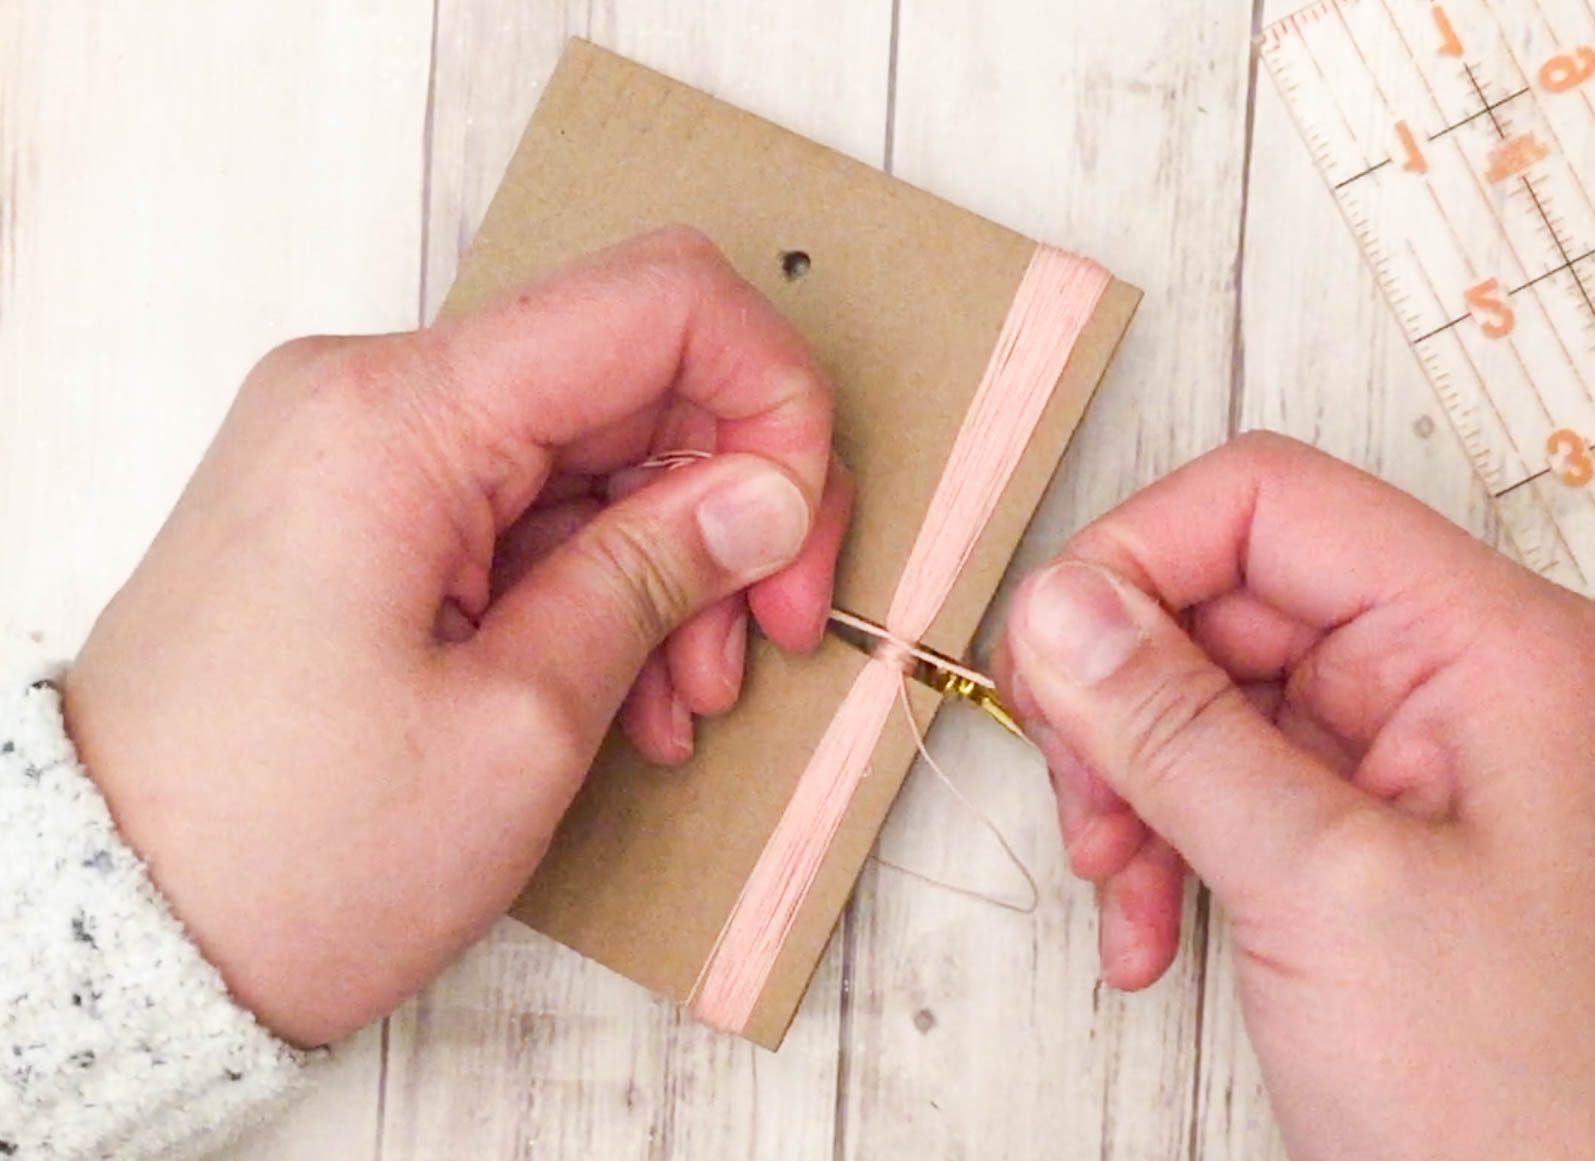
Once you’re happy with how the cord is wrapped (mine ended up being a little less than 1/2” thick), tie a double knot. You want to try to position the knot so that it’ll be at the top towards the clasp and close to where all the ribbons meet. It’s important to position the knot here so that the ends and the knot can be properly tucked and hidden away.
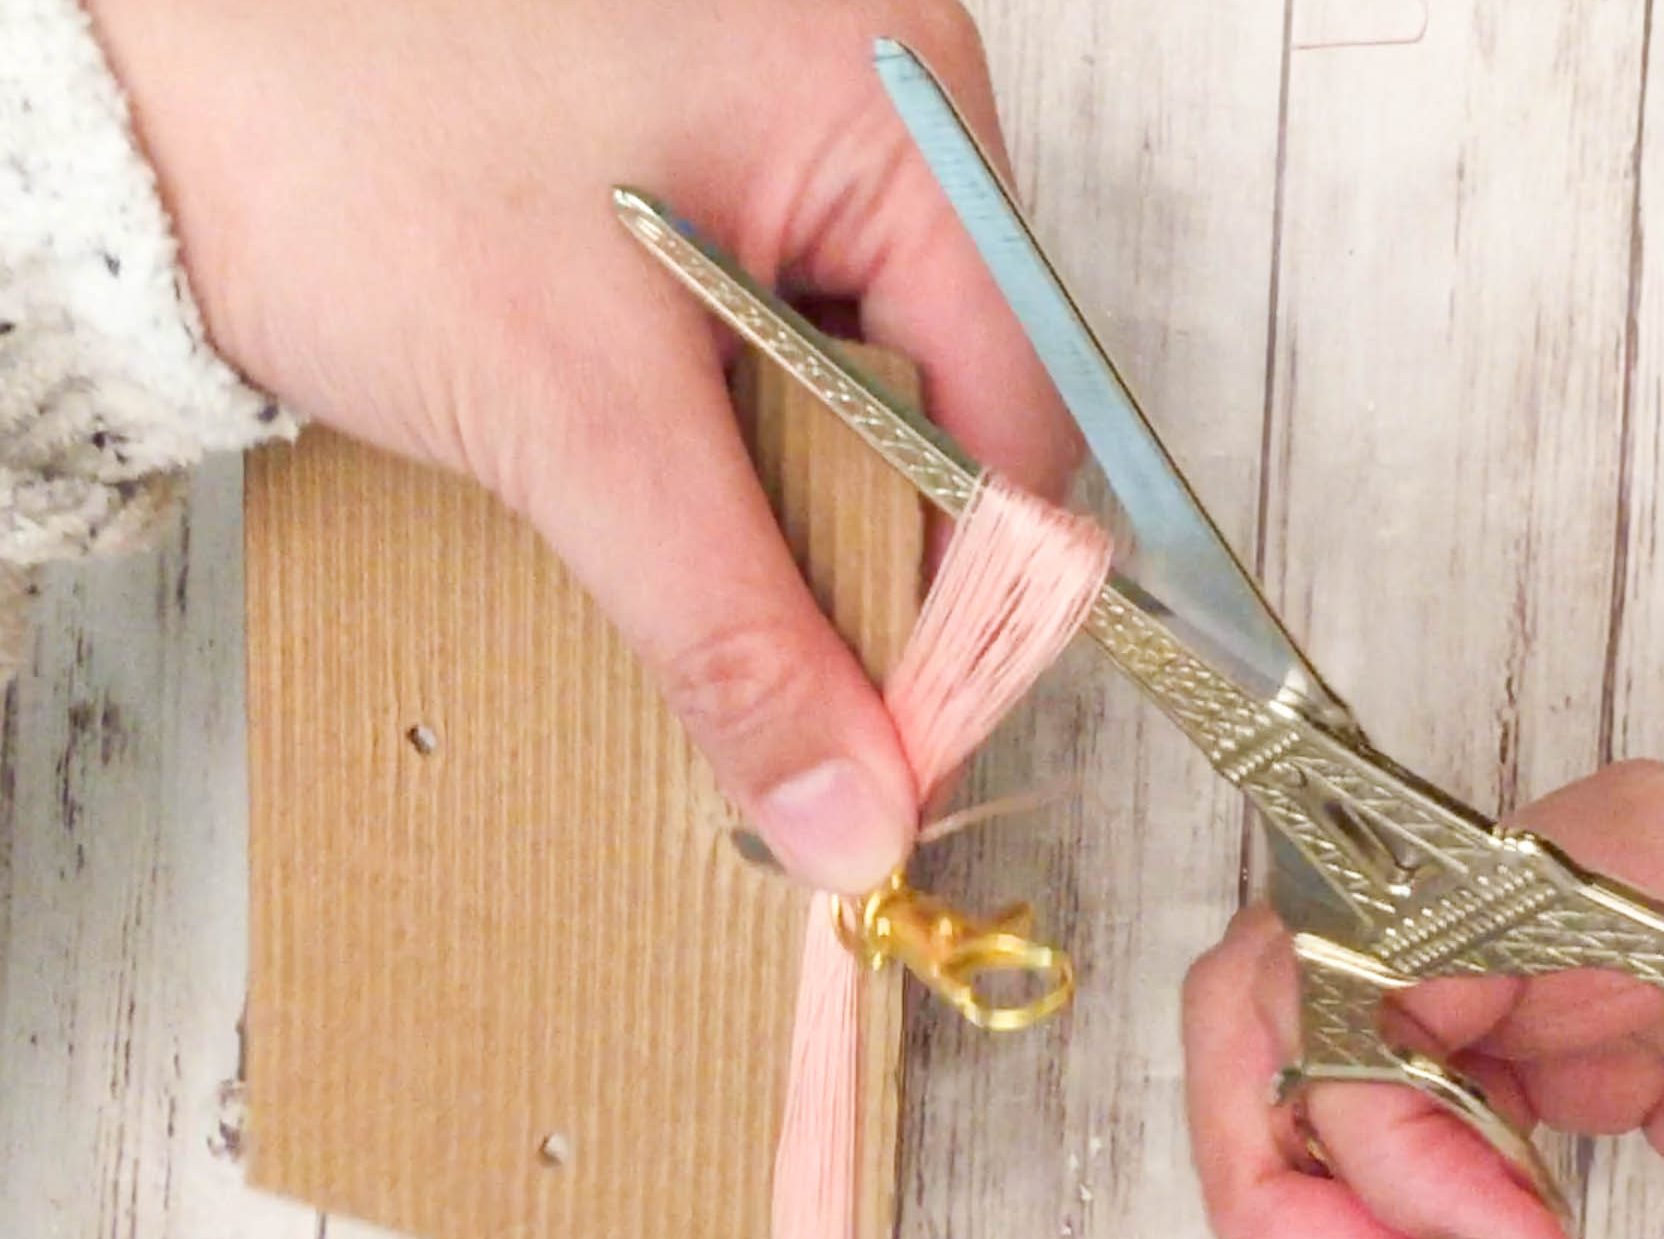
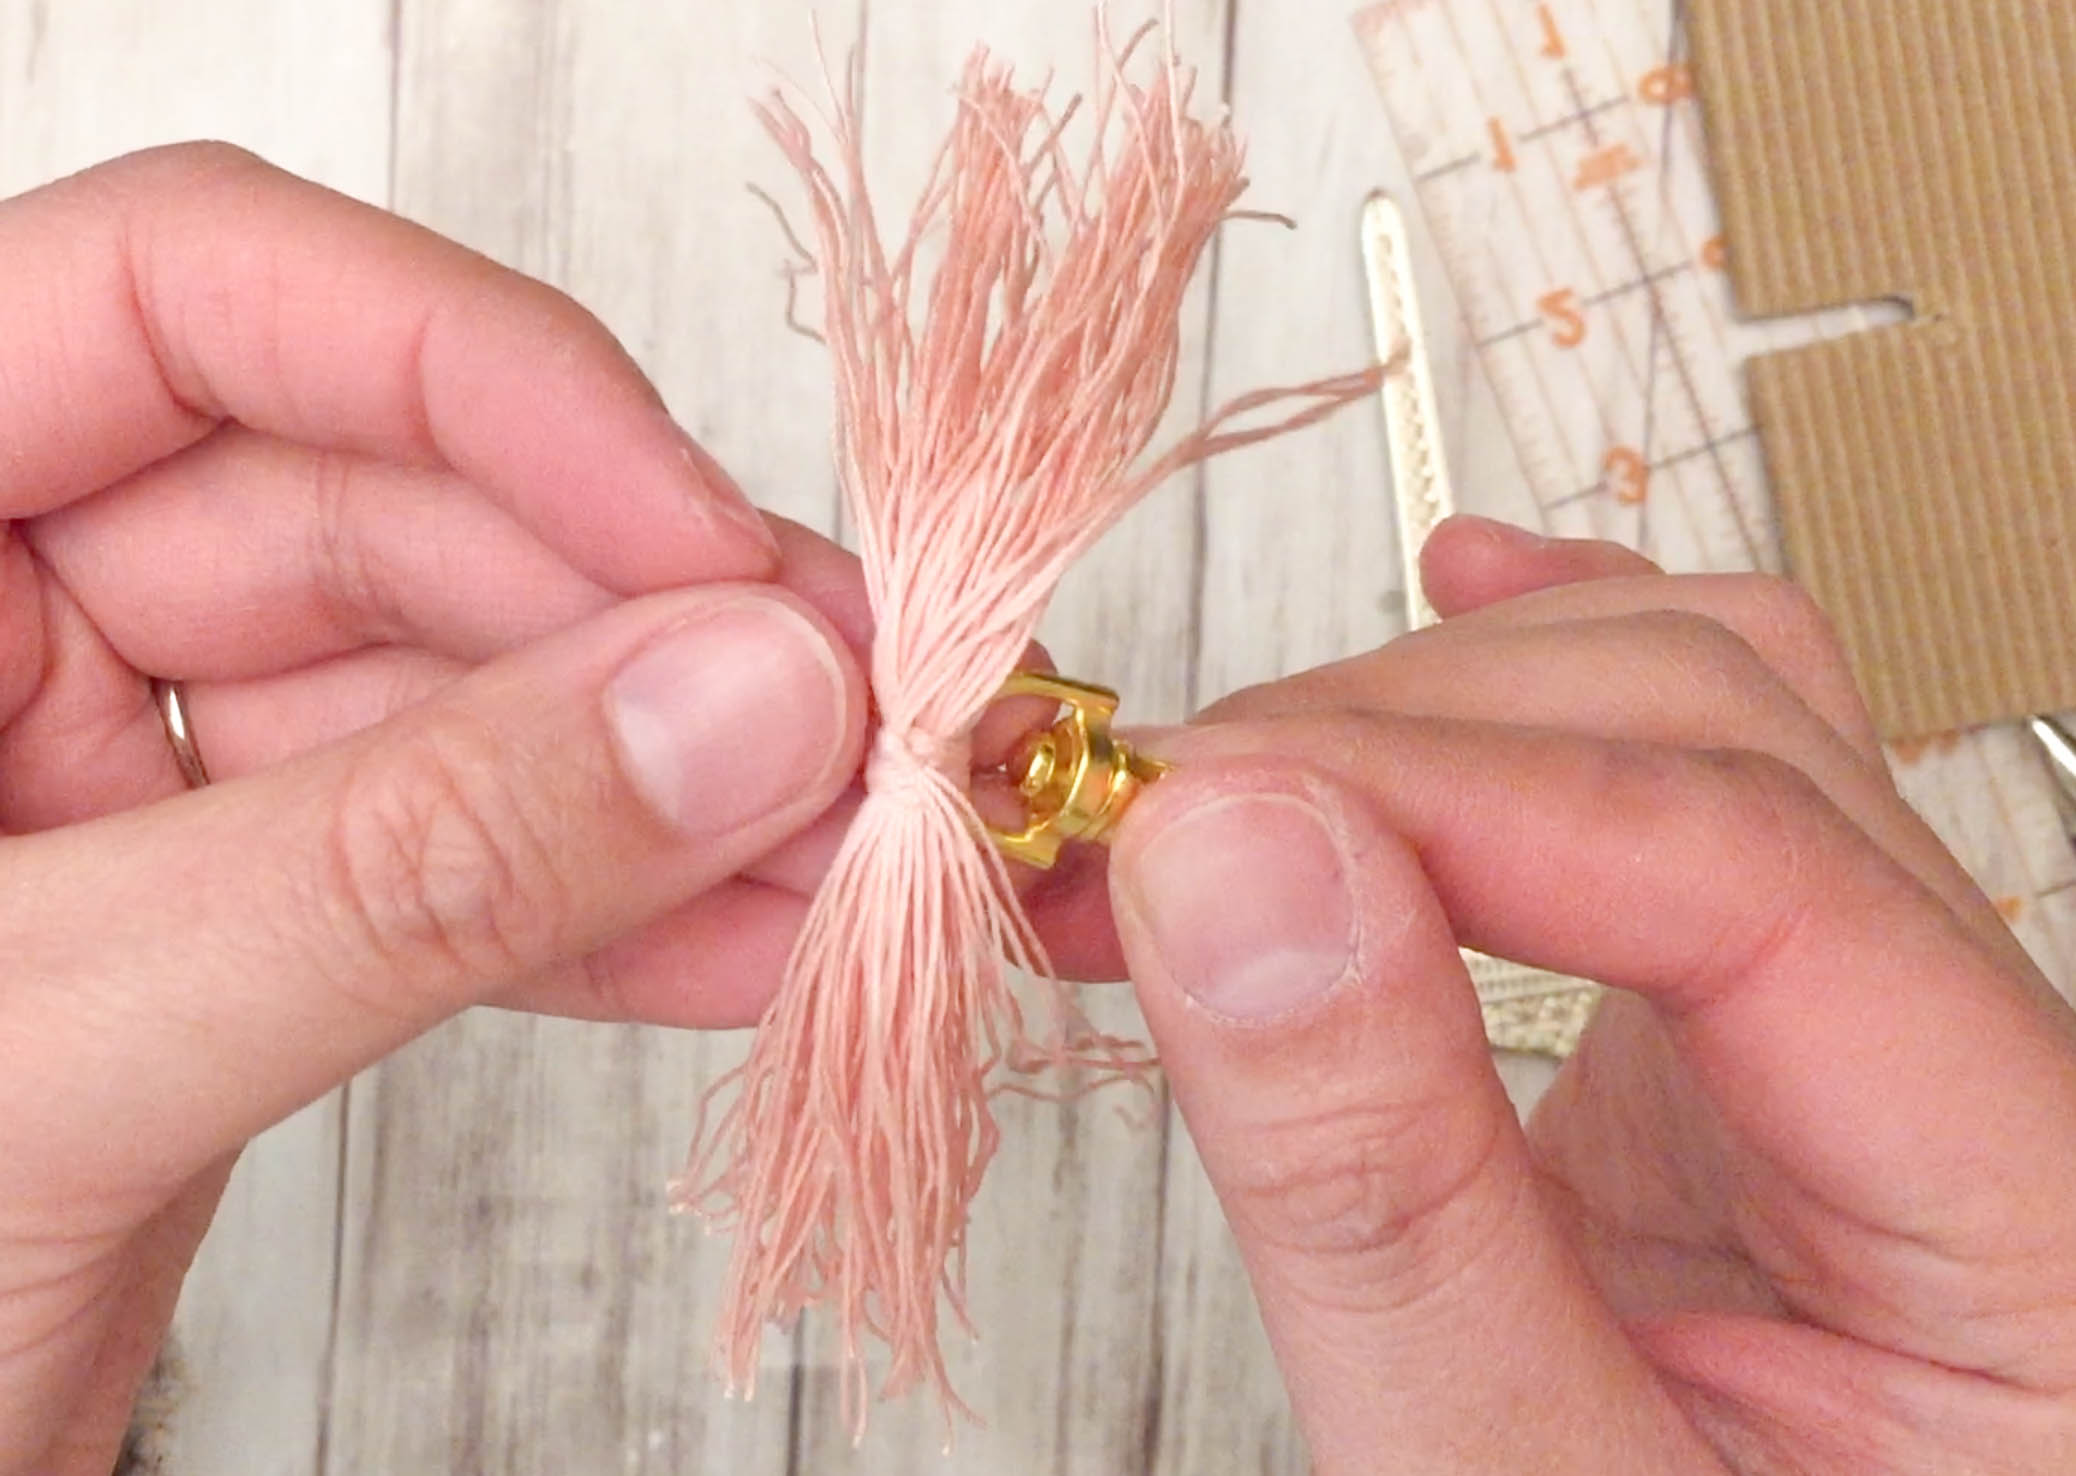
Once the double knot is tied tightly, cut the ends, leaving about a 1/4” to 1/2” of lame cord sticking out. Using the end of a paperclip, tuck the loose ends and the double knot into the fold where the ribbons meet. This will hide the knot so the gold lame cord wrap looks seamless.
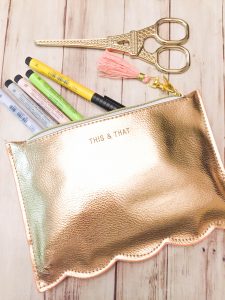
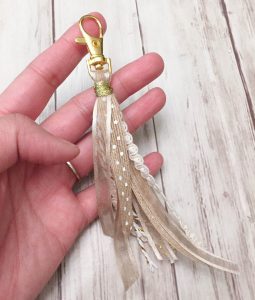
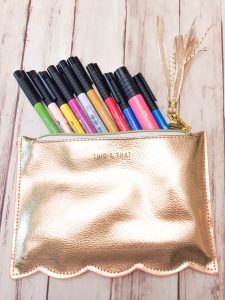
Once that part is done, you’re pretty much finished. Use your newly made tassel to decorate almost anything. I’ve clipped mine to pen bags and notebooks.

Once the ends are tucked in, your ribbon tassel is done!
Making the embroidery tassel is very similar with the exception of Step 2. You will replace Step 2 in the above instructions with the following steps.
Embroidery Tassel
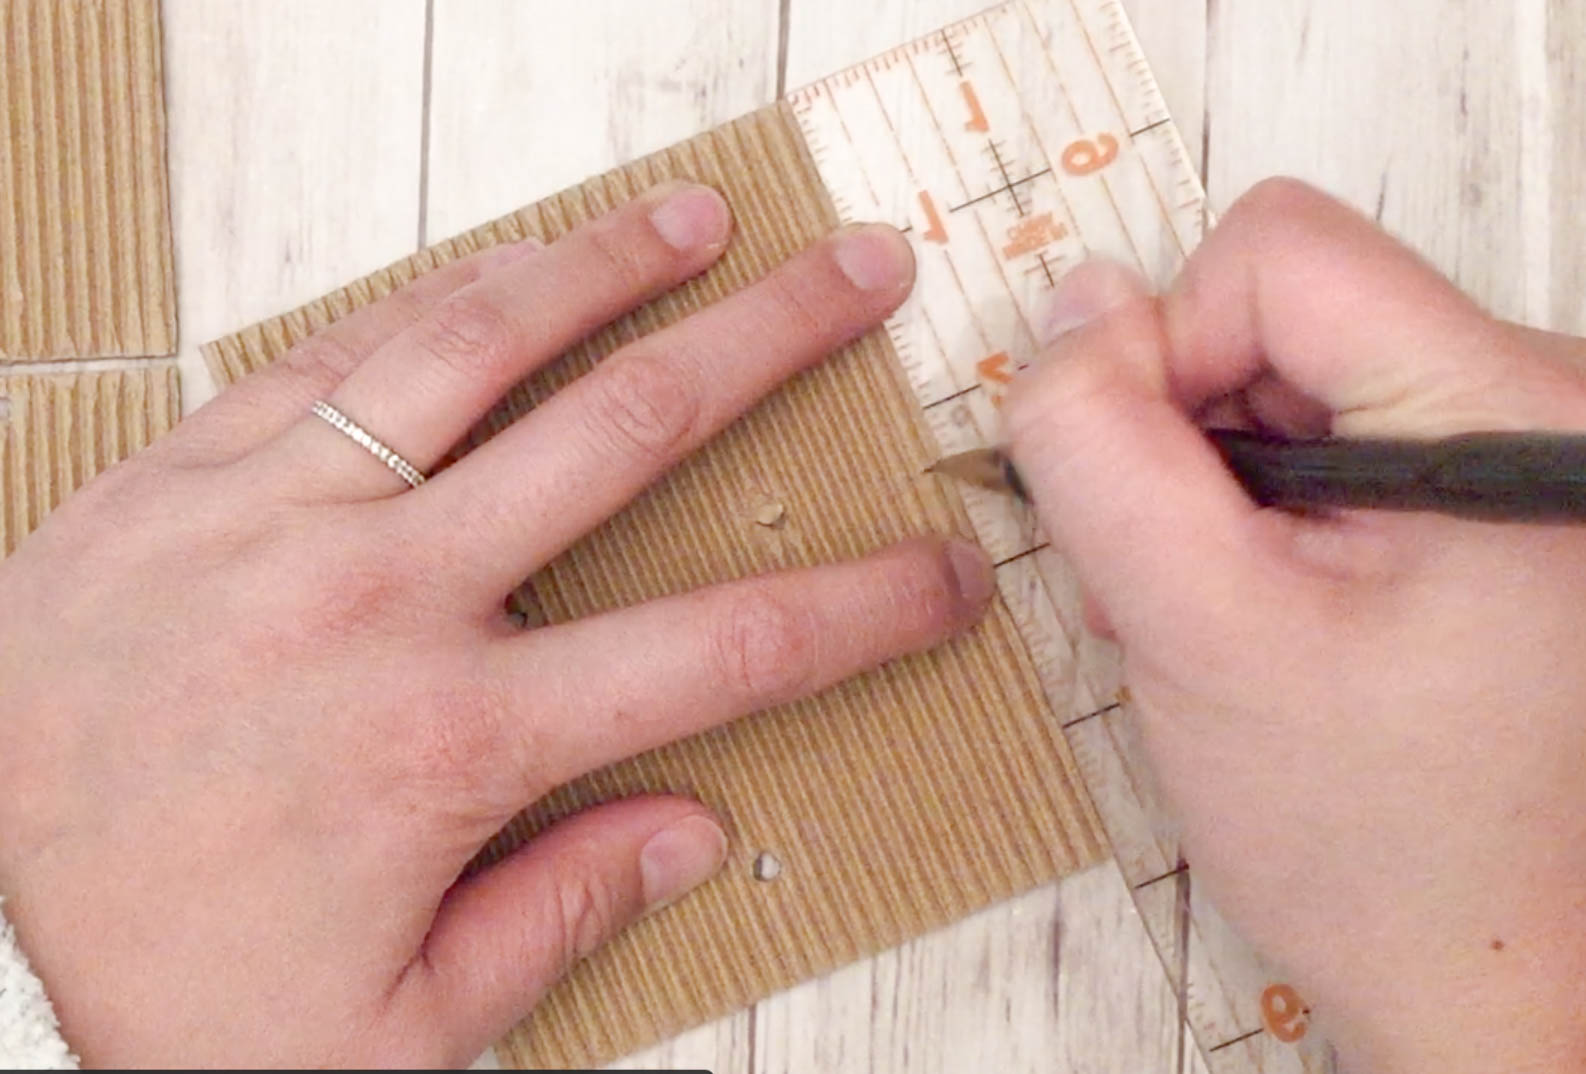
Step 1: Cut some cardboard
I tried buying a tassel making device from the crafts store to see if it would be easier but I found this method to be a lot easier and cheaper to do. Just find a piece of scrap cardboard and cut it into a square that’s roughly double the length of your tassel. The photo below shows a finished tassel roughly half the size of the cardboard piece I have cut out.
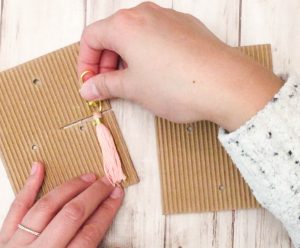
Use a ruler to measure the exact center of the cardboard piece. Draw a line and begin cutting a slit through the center.
Step 2: Measure and cut the embroidery thread
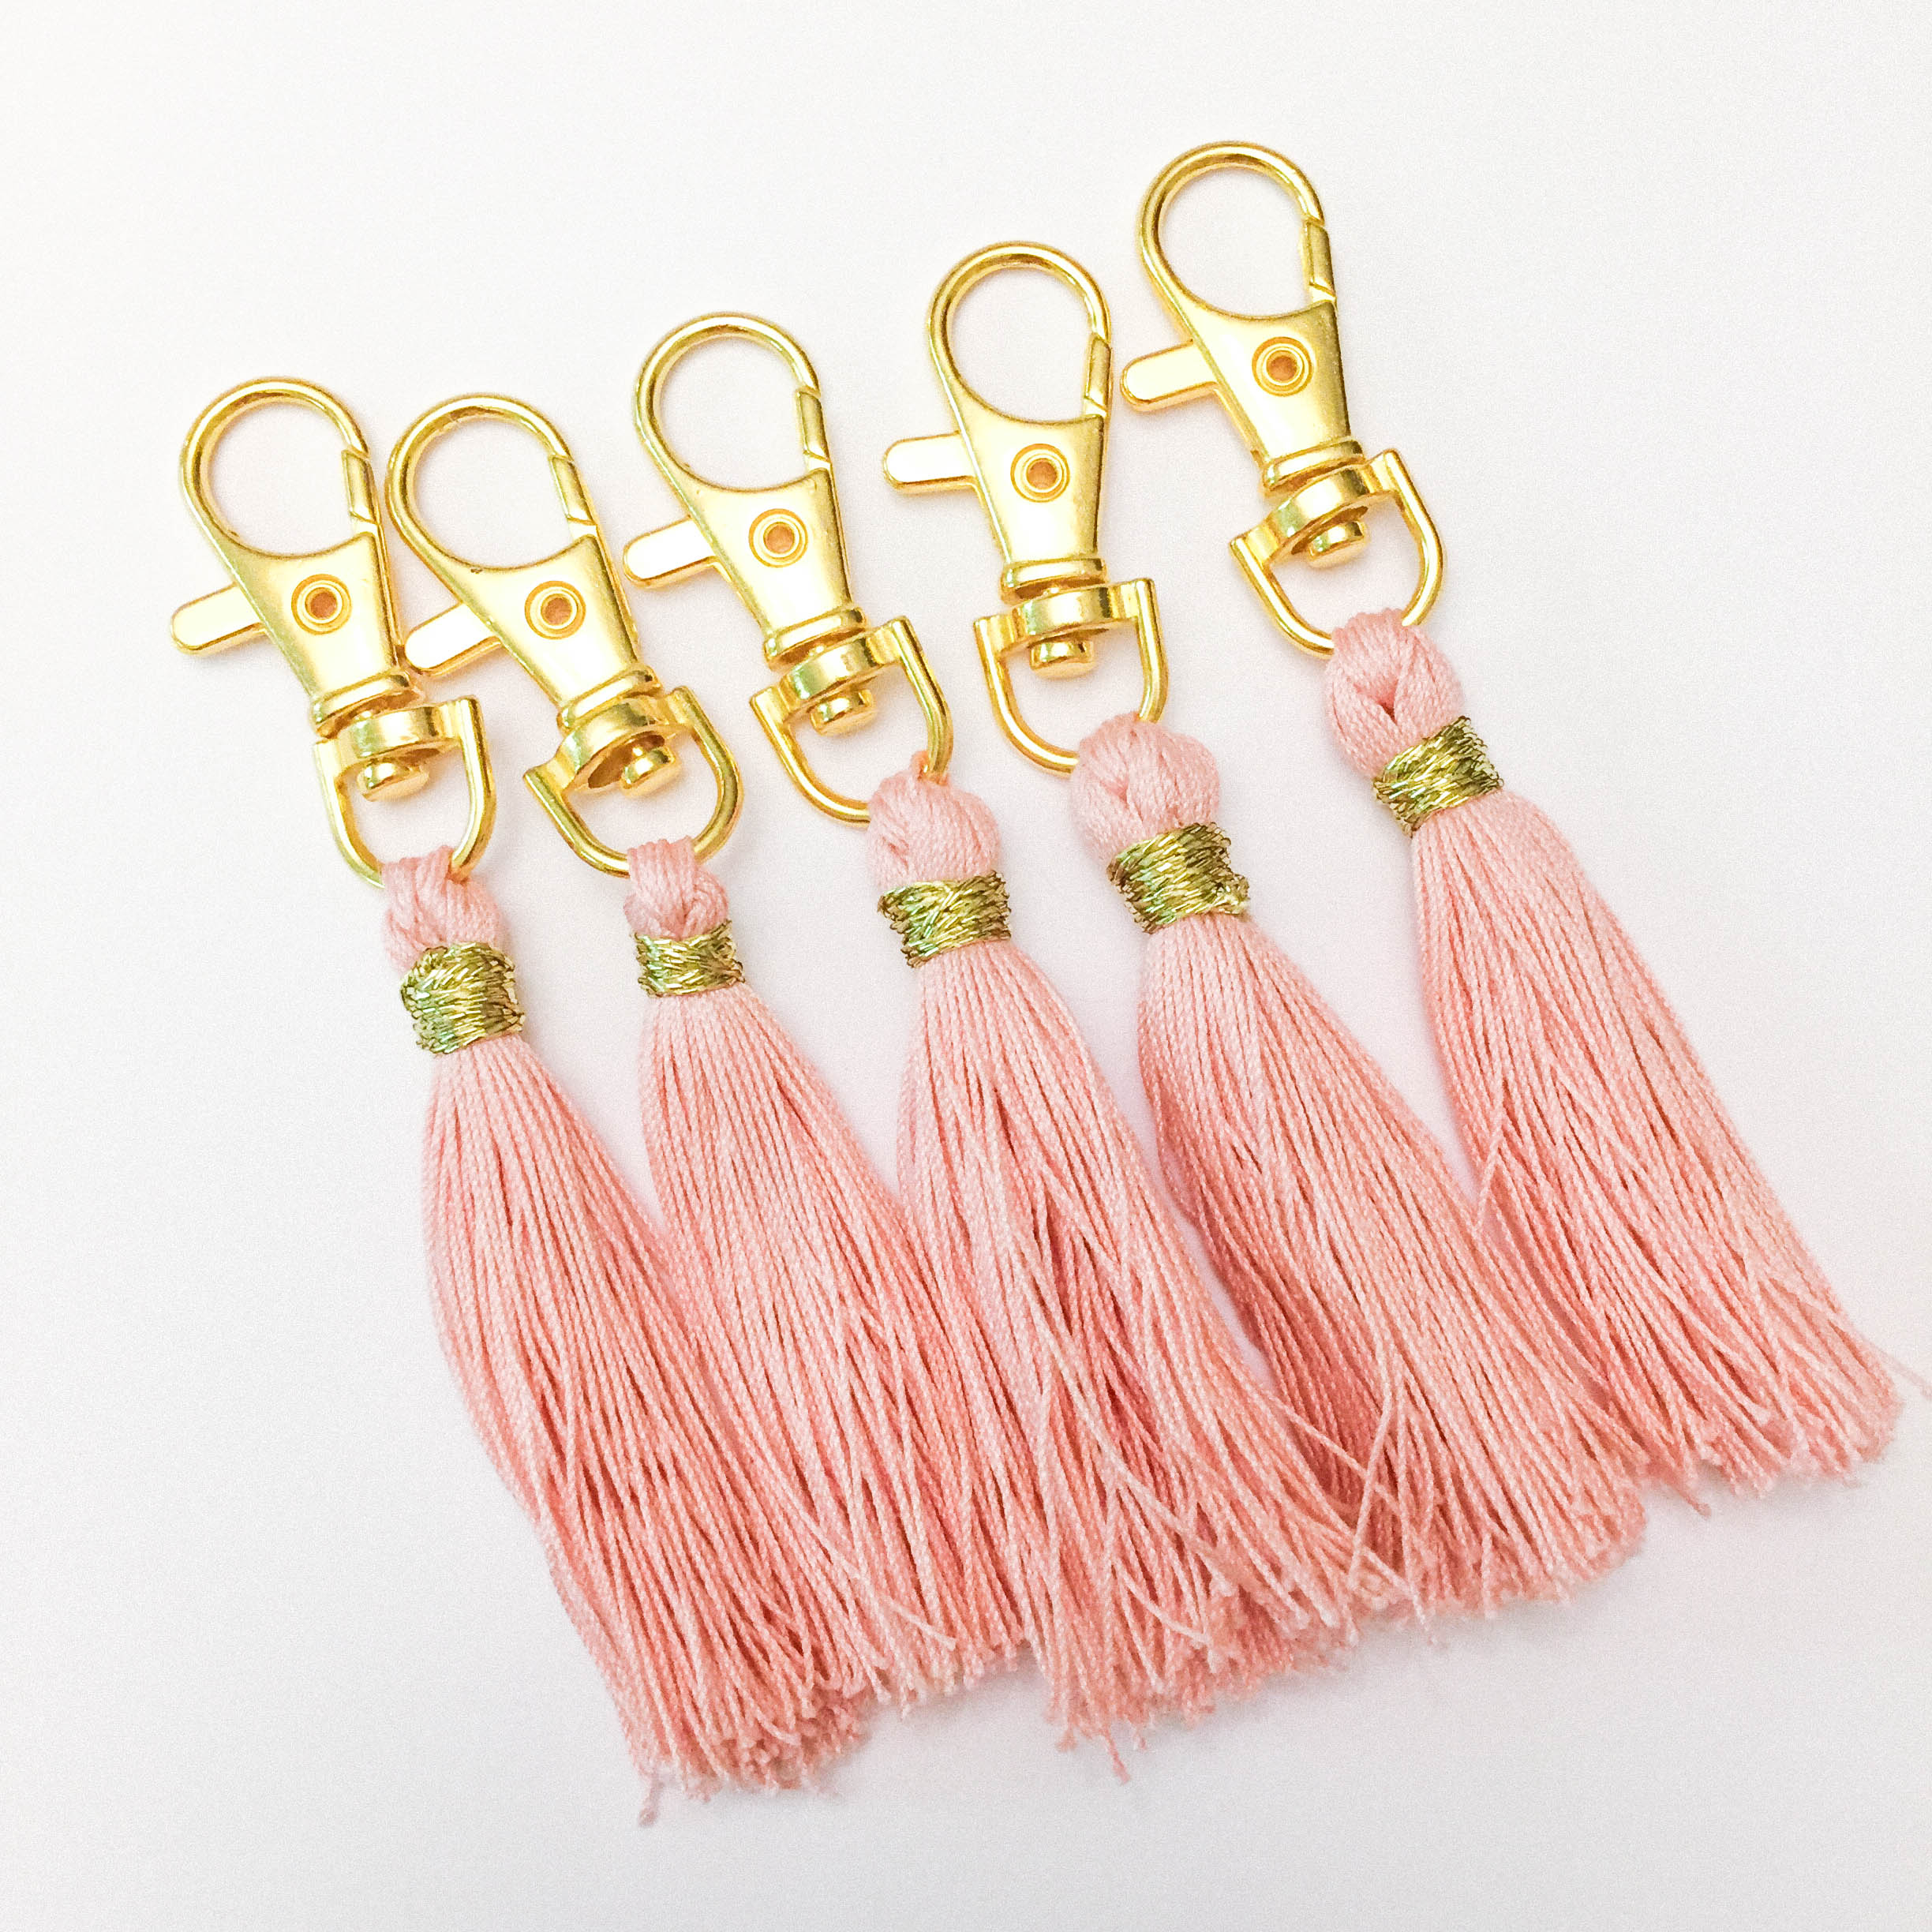
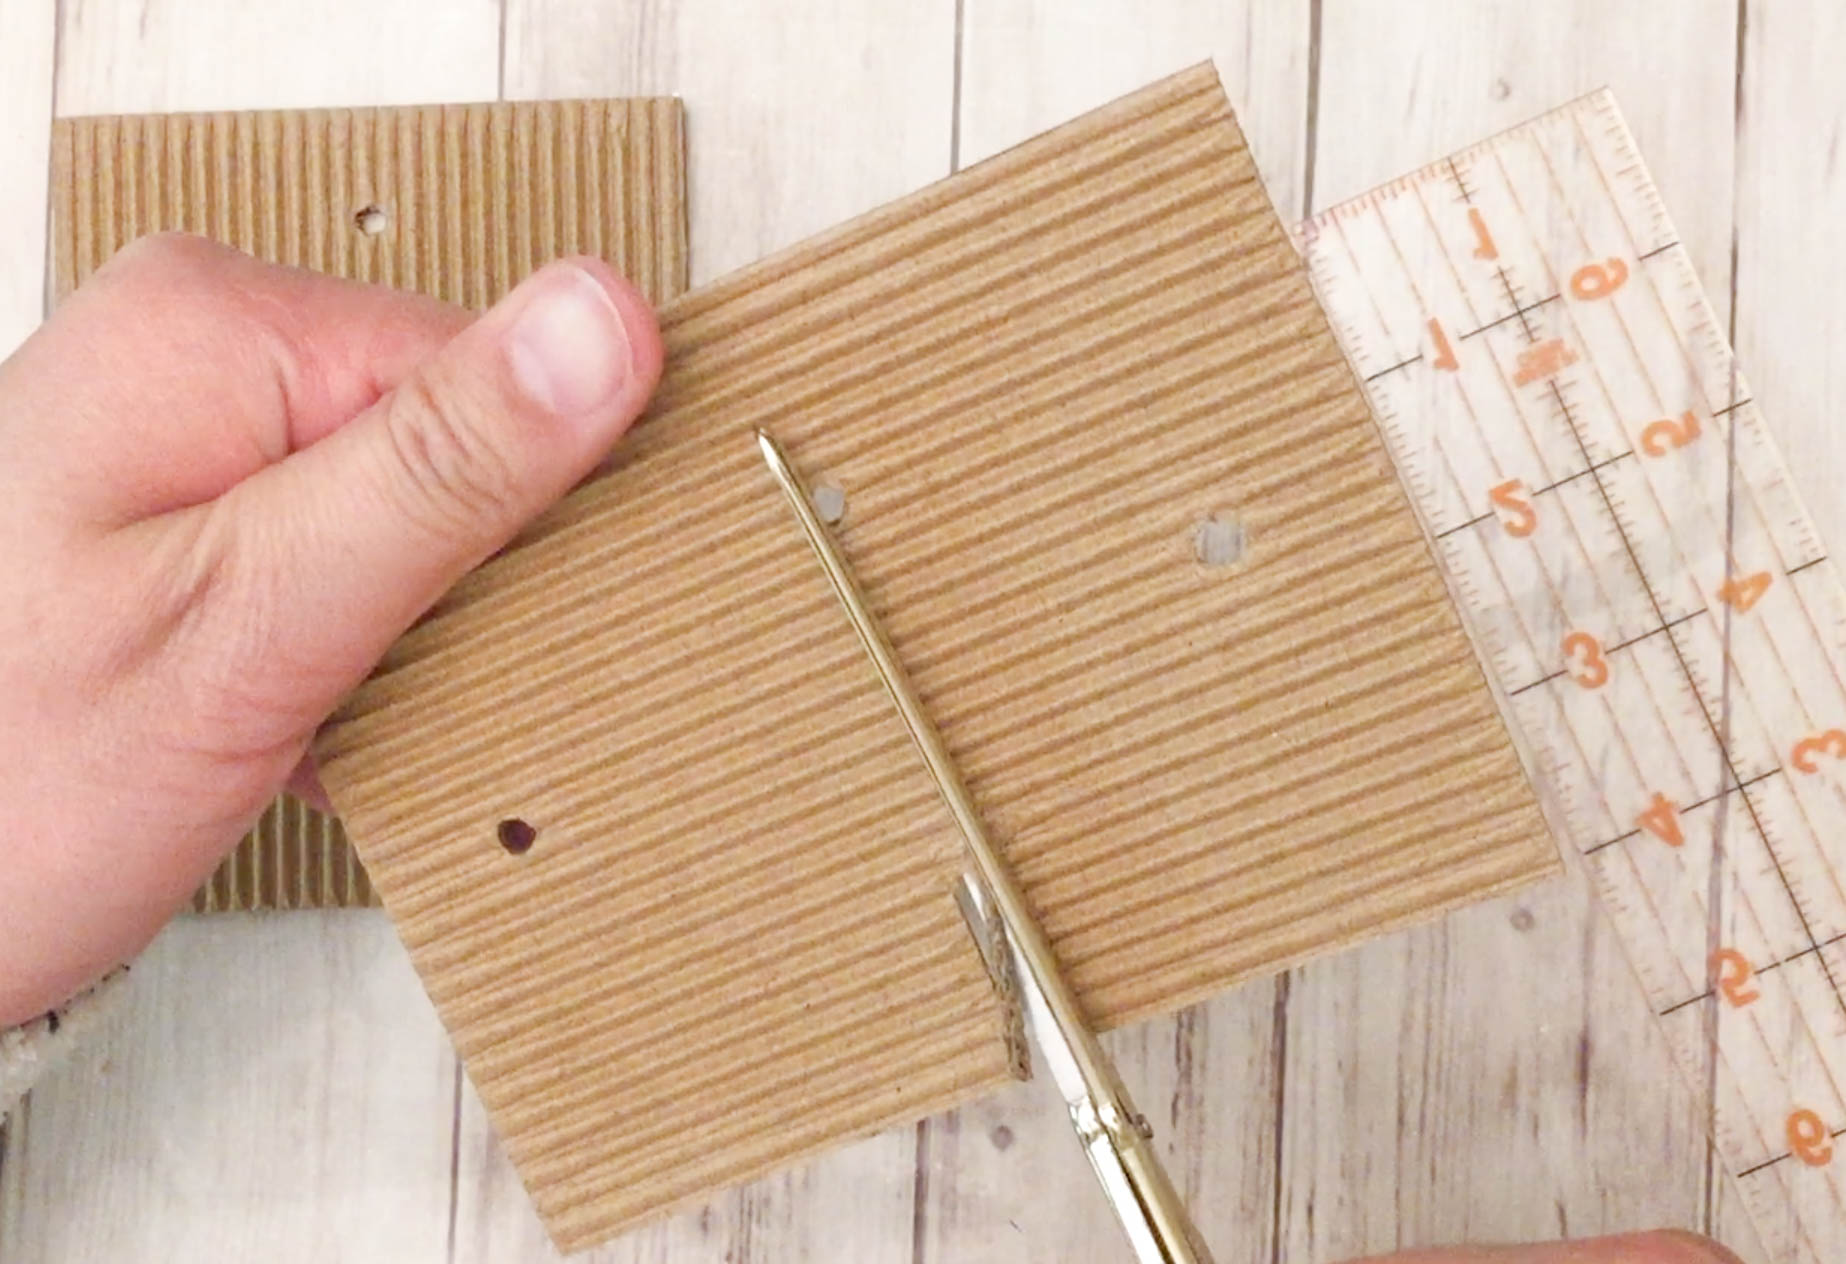
Now, holding one end of the embroidery string, wrap around the cardboard until you are satisfied with the thickness of the tassel. If you are making multiple tassels, keep track of number of turns so that you can be consistent in the thickness of your tassel.

Once you’re happy with the number of wraparound turns, snip the ends. Quadruple thread about 12″ of embroidery floss and weave it through the swivel portion of the keychain. Use the slit that was cut in the center of the cardboard to begin tying all the thread together. Weave several times through the swivel keychain to secure it completely before tying a double knot.
Step 3: Tie the threads together with gold lame cord
Now that the threads are tied together at the center, you can slip all the threads off our cardboard apparatus. Slip off one side at a time and be careful to keep your finger through the loop so that it’s easier for you to cut through all the threads once all of it is slipped off the cardboard. Repeat on the other side until both ends are off the cardboard.
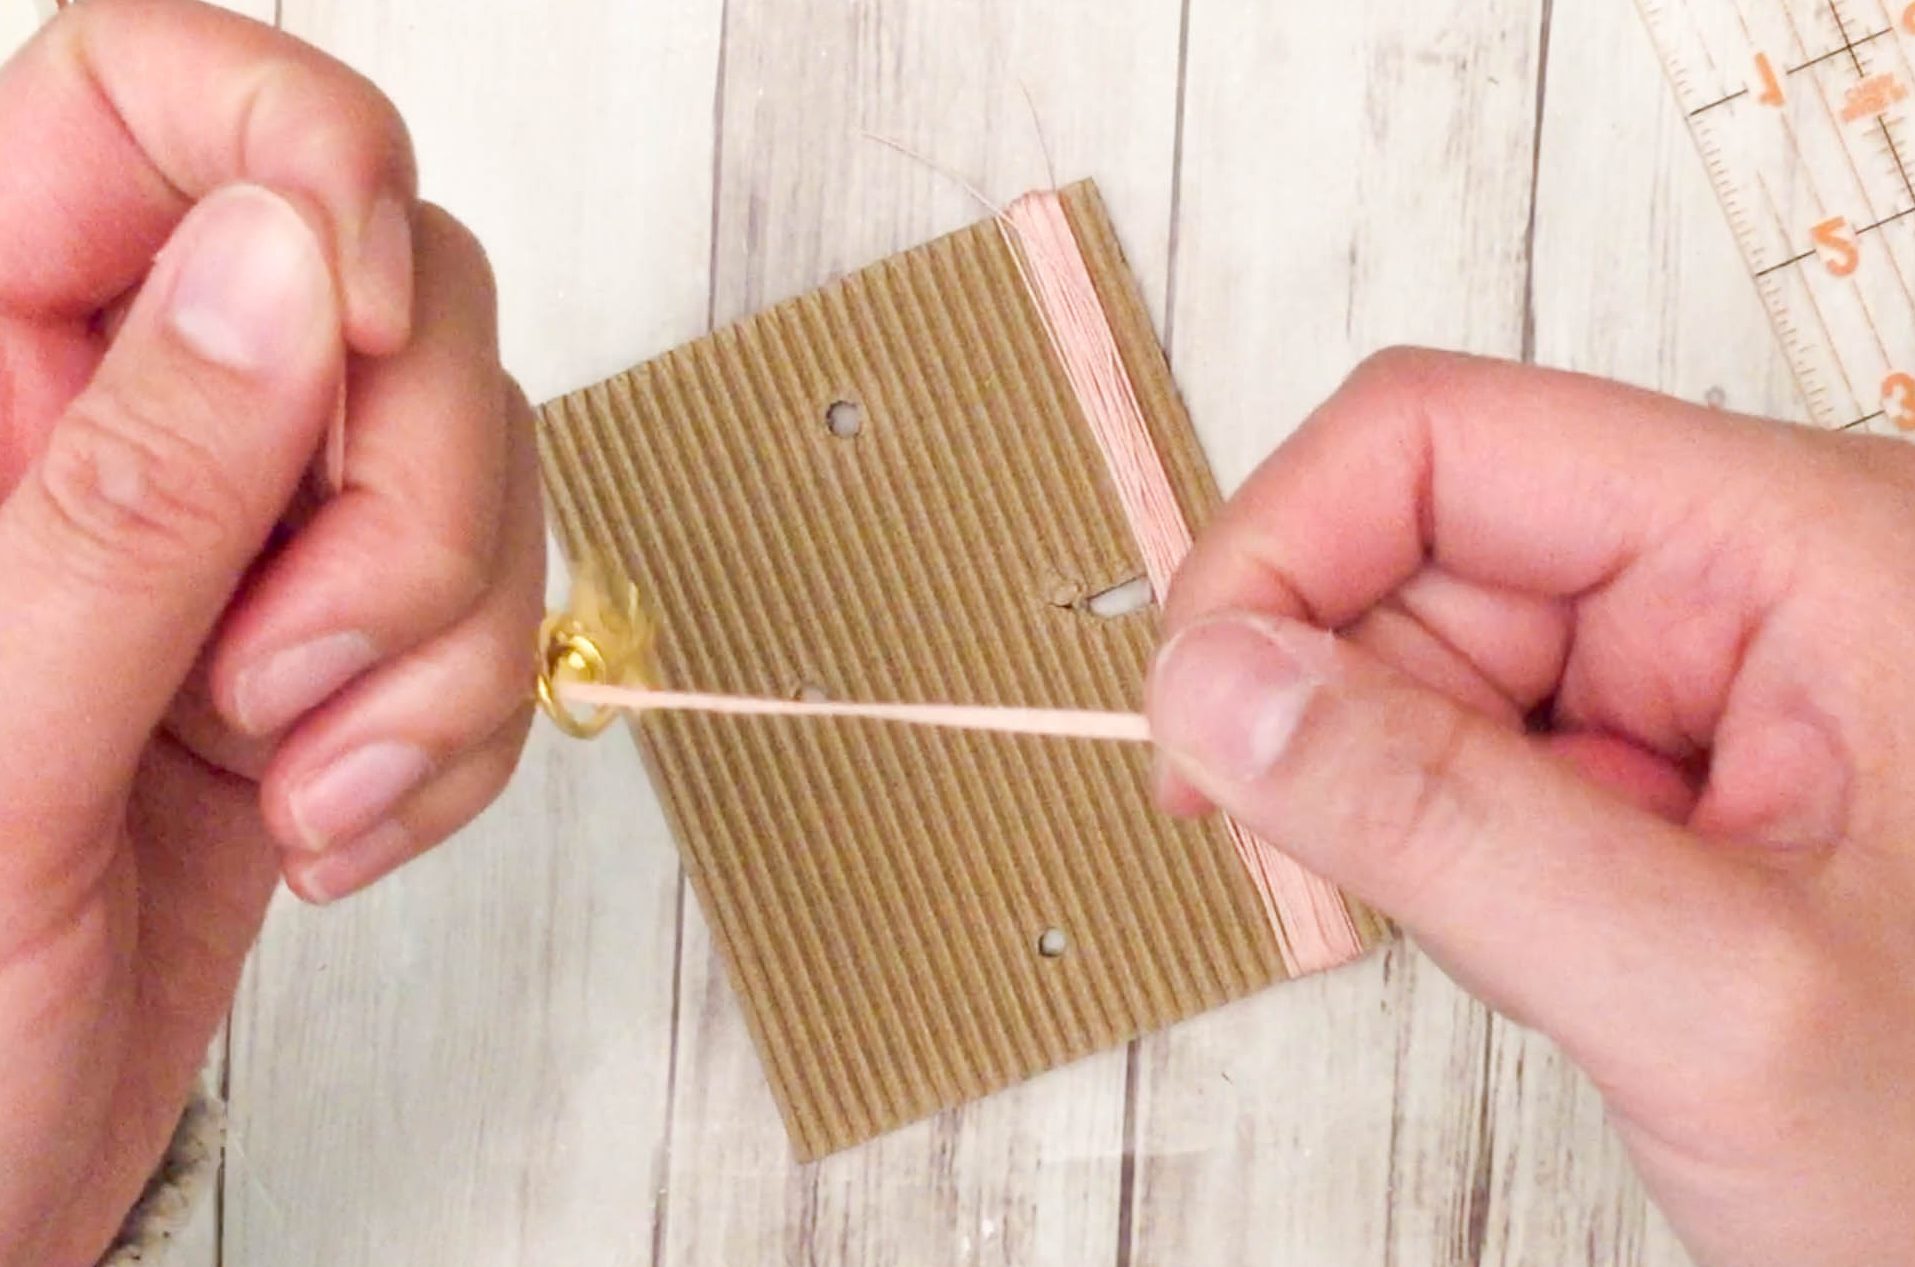
Fold the two ends together (just like we did with the ribbons) to cover the double knot on the opposite side of the swivel keychain. Double thread the lame cord to about 10 inches in length and tie a basic knot at the top near the keychain.

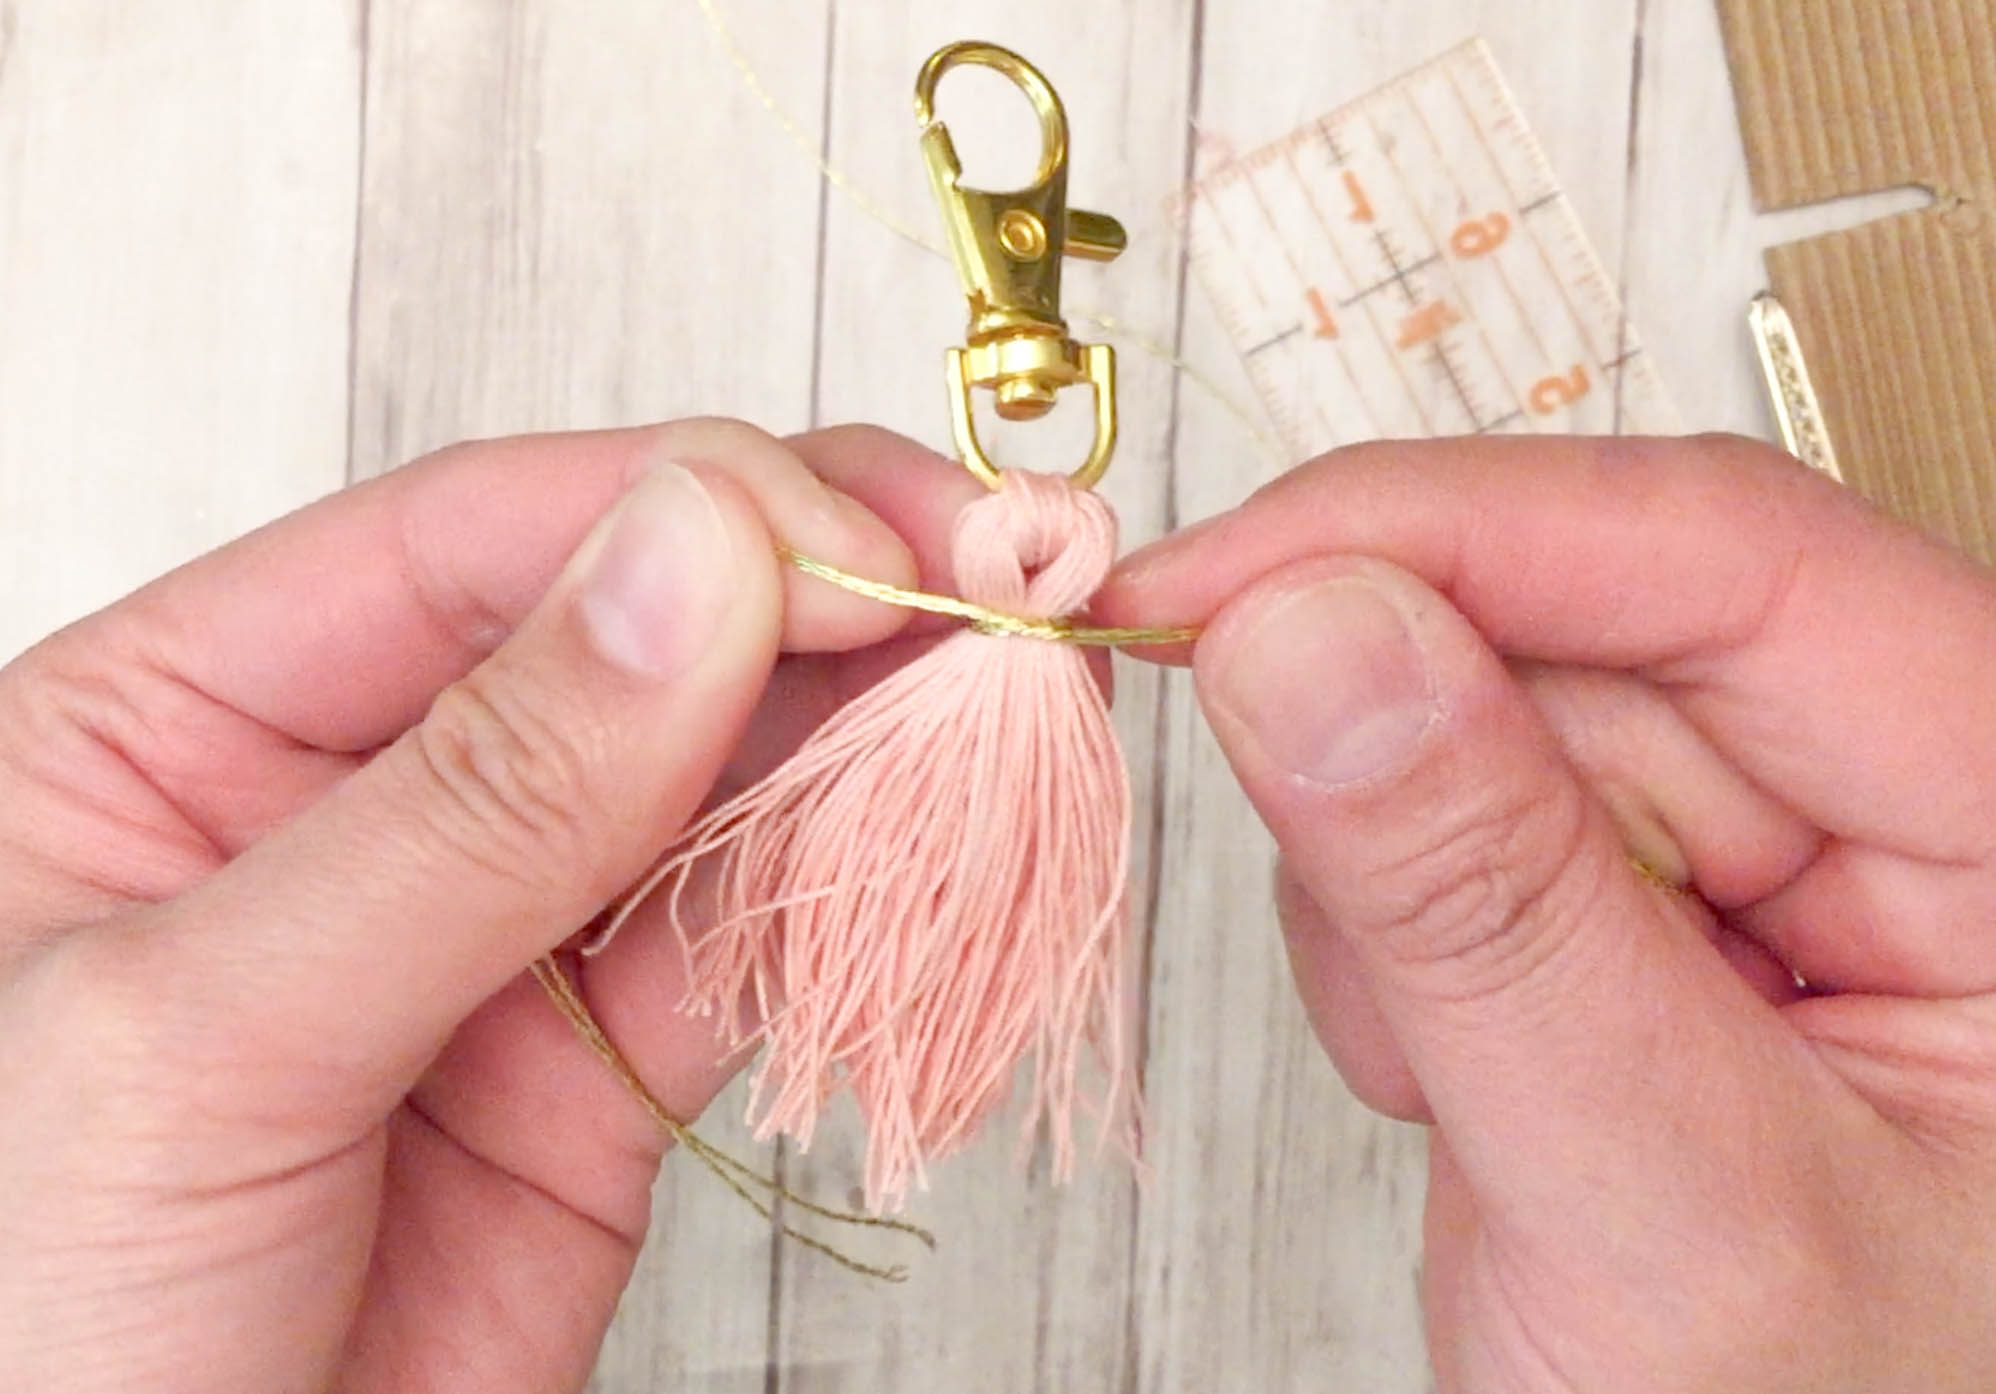
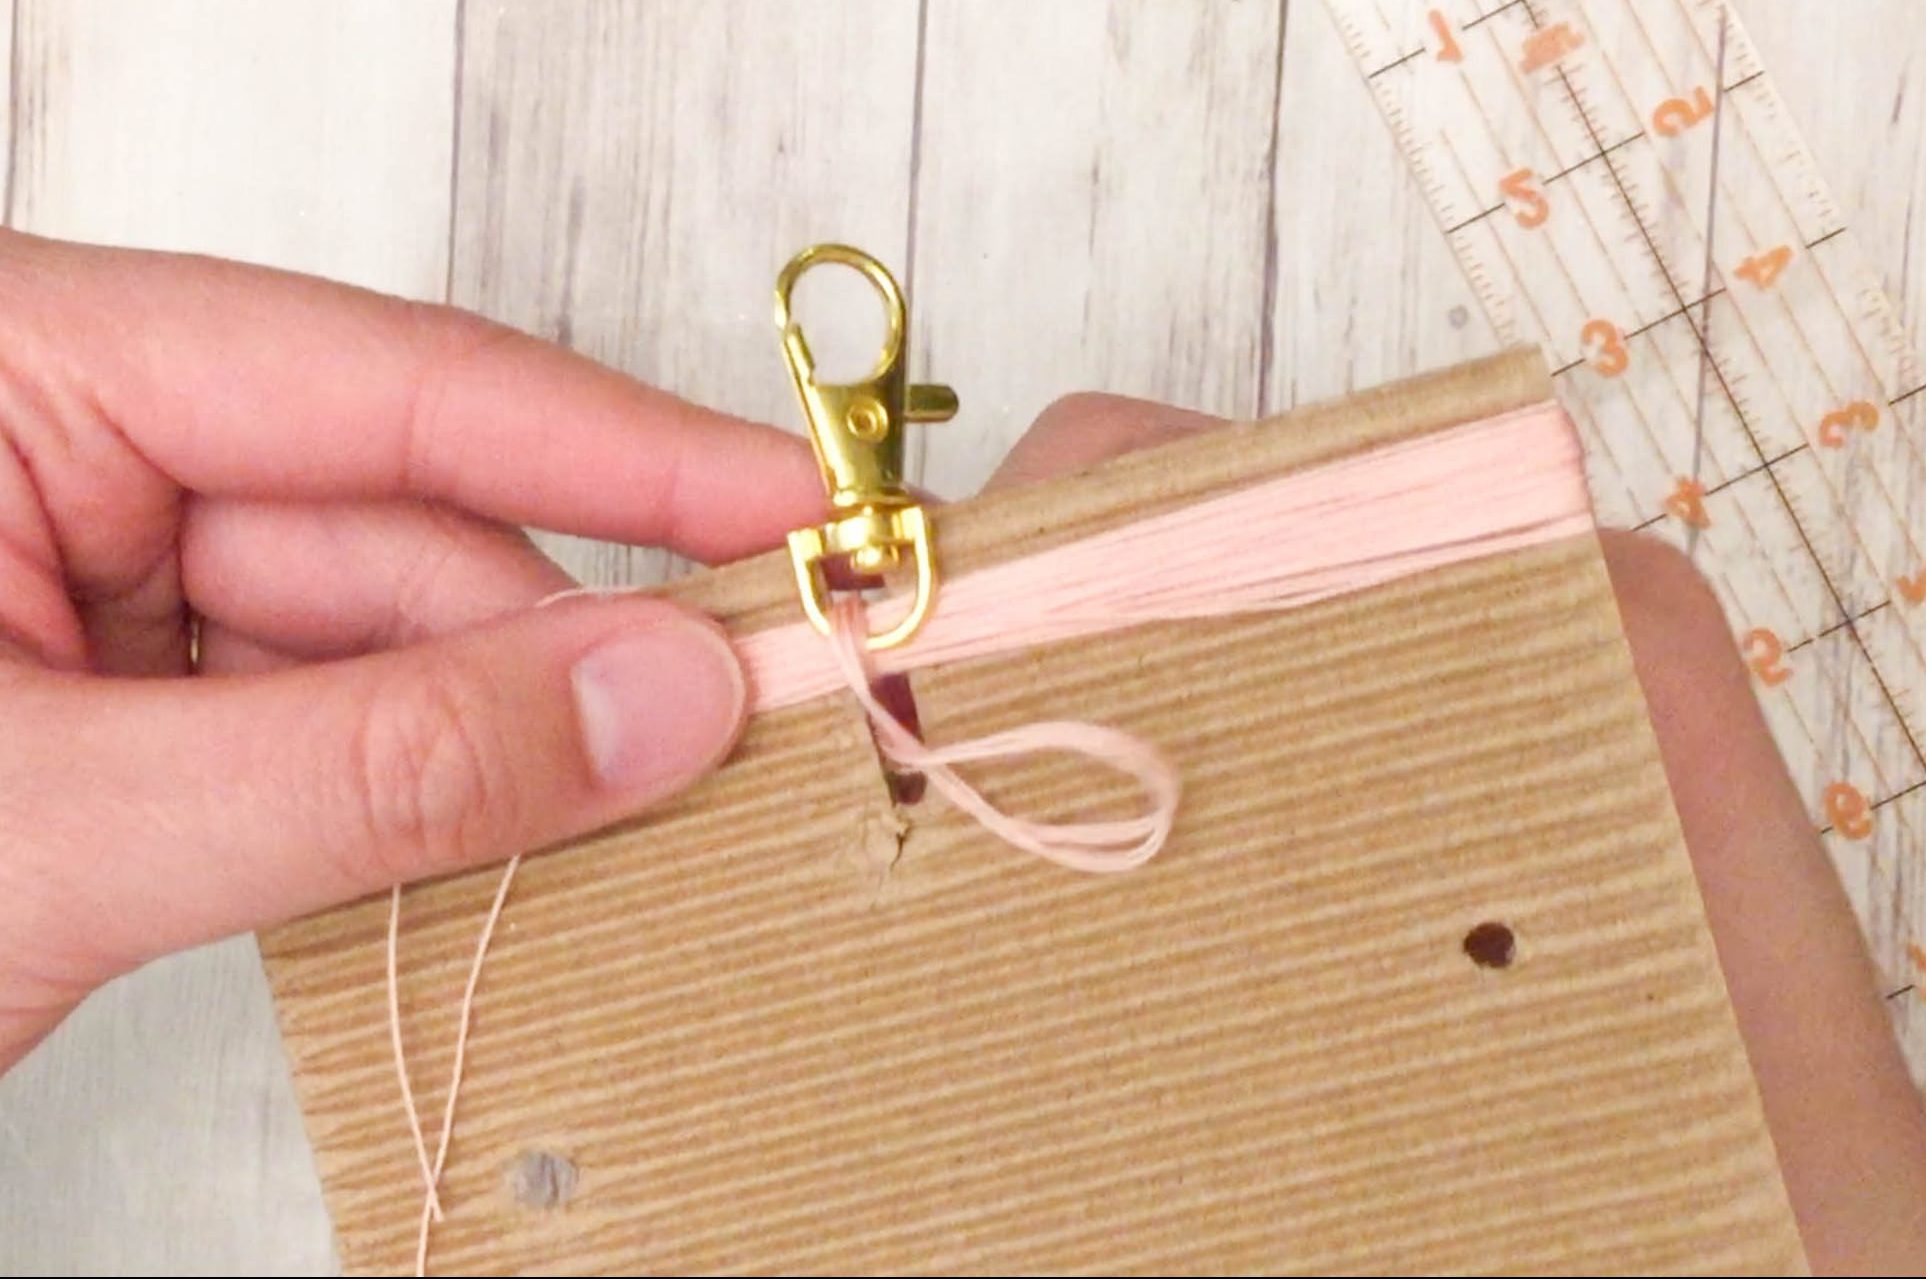
Wrap the cord around until the thread underneath is completely covered. Once you’re satisfied, tie a double knot tightly near the top of the keychain where the fold of the threads meet.
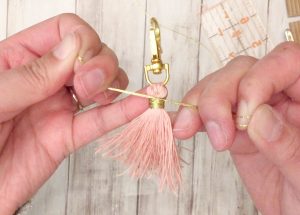
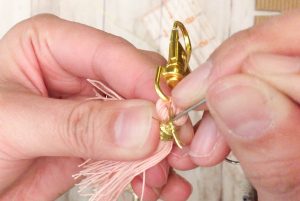
Step 4: Hiding the ends of the lame cord
Once the double knot is tied tightly, cut the ends, leaving about a 1/4” to 1/2” of lame cord sticking out. Using the end of a paperclip, tuck the loose ends and the double knot into the fold where the ribbons meet. This will hide the knot so the gold lame cord wrap looks seamless.
And voila! Another tassel DONE and DONE.

I’d love to see if you guys try this! Tag me on social media so I can have a look.


1 Comment
Hey! I am Shreya, and I am 12 years old!
you inspire me in every video!