
Digitizing your work will open so many new doors. Products that are made by hand can be beautiful and bespoke but also time consuming. By learning how to digitize your work, you will be able to save time and also create reproducible prints.
I want to start by saying that I am NOT a graphic designer. In fact, I am still working on learning Adobe Photoshop and Illustrator, but I haven’t quite mastered it yet. So for now, I have a very basic system for getting my pen and paper onto the computer. This is the very first method I used to get my handwritten work digitized and I find that it’s still really effective. From here, I can make reproducible prints or prints that can be easily foiled (see the how to DIY foil tutorial here).
Things you’ll need:
- Black ink and writing instrument of your choice
- Paper
- Computer
- Silhouette Studio Software
Step 1: Write out your phrase and take a photo
I always start with black ink, my favorite being Moon Palace Sumi Ink and some Rhodia unlined paper. Black ink, for obvious reasons, is easier to see in a scan or picture taken with your phone. Sumi ink shows up very opaque, which is easier to photograph. Rhodia paper is thick and high quality which means it has a decreased chance of bleeding. Check out a list of my favorite pointed pen tools here. Try to find the best lighting you can to take your photo. Limiting shadows will help make the digitizing process easier.
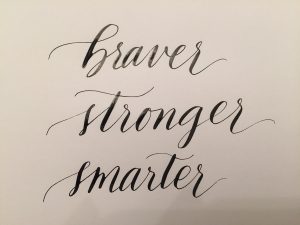
Original image
Step 2: Use your phone’s software to digitally enhance photo
From here, you can always scan the image, but a quicker (aka easier) way is to just take a photo with your phone. I’m using my iPhone 7 to do most of my work. Use the “noir” filter to make the image a little cleaner and more crisp. Then, play around with brightness and contrast to make sure the image is bright and readable.
You can actually adjust even further to remove some of the shadowing (like on the bottom right corner). However, this image should work fine. Furthermore, you might find that you’ll have an easier time digitizing if you spend a little more time with the photo editing.
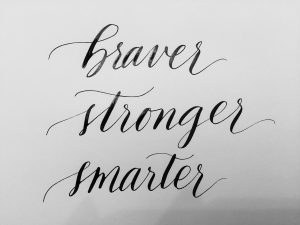
Image with “noir” filter and increased brightness
Step 3: Use the Silhouette Studio to trace your work
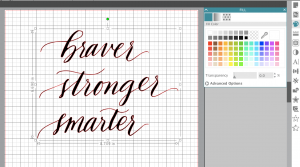
Now, if you’re good with Adobe Illustrator, you can use the snapped images to make a vectorized version of your lettering using the “trace image” function and cleaning up the plotted points. Since I am NOT good at Illustrator, but pretty good using my Silhouette Studio (the FREE paper cutting software I use with my Silhouette Cameo), I use this program to outline the writing, trace it, and then fill it in as a graphic.
Next, open the program and select “open” and find the file of your photo. Size your photo down to fit the screen.
Find the “open the trace panel” icon and click on the “Select Trace Area” button. Highlight the area where your lettering is. You can adjust the “high pass filter”, the “low pass filter”, the “threshold”, and “scale” to adjust the amount of detailing that gets highlighted. You may need to play with some of the values, especially if you have a lot of fine hairlines. Finer details tend to get lost during this process.
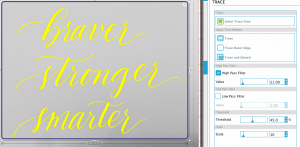
Once you’re satisfied with the highlighted portion, click on “trace” to trace around all the yellow highlighted parts.
You’ll see a red outline around where all the highlighted yellow portions were. If you find that the outline isn’t right, you can go back and make adjustments, then re-trace again. You can now delete the background original image. This will leave only the red outlined image.
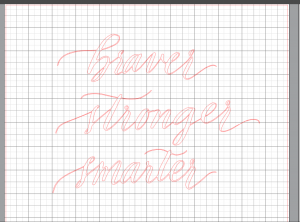
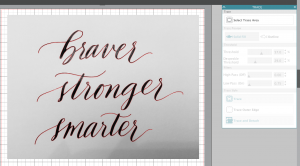
Because I don’t always write straight, digitizing my work lets me play around with it until its just right. You can also write the words small and then use your computer to enlarge it. Once it’s vectorized, you can enlarge it without compromising resolution. Because the pen nib isn’t big enough to letter on a really large scale, digitizing your work allows you to scale it larger for big prints.
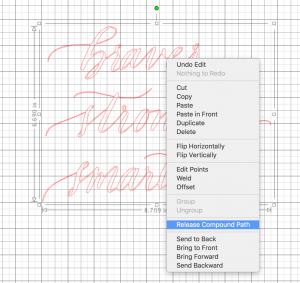
Step 4: Making adjustments
To make adjustments, you have to right click and find the option for “release compound path”. This function will separate the individual words, otherwise, the program will assume you want them all clumped together. Once you’ve released the compound path for the whole image, you can go back and form the compound path for each individual word (and not the whole image) since there are loops that you want formed together.
-
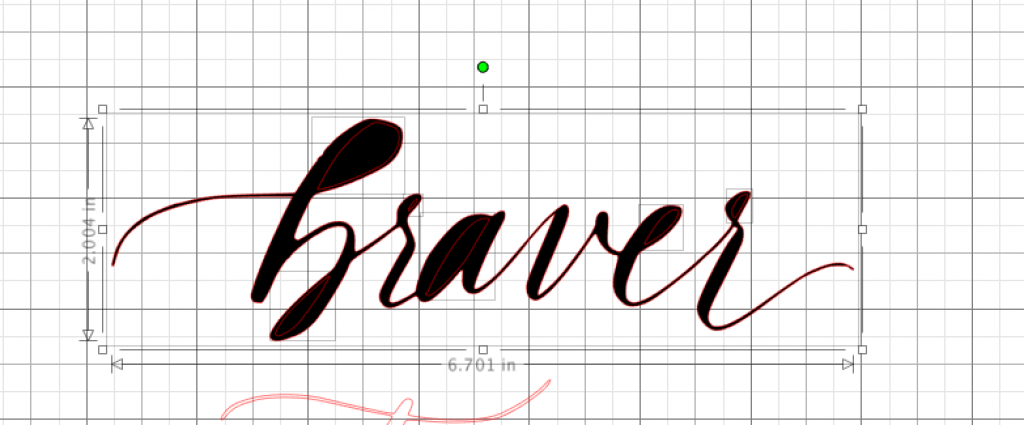
- Without “make compound path”

-
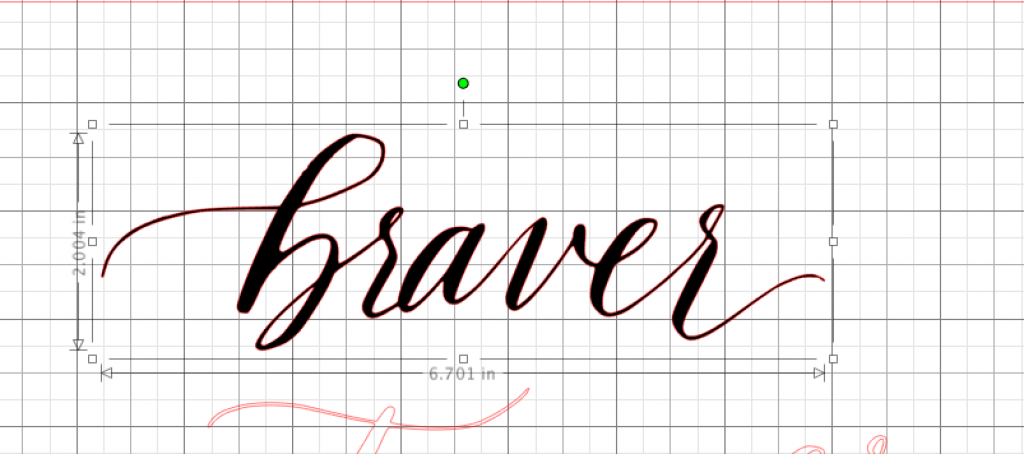
- With “make compound path”

Furthermore, you can add text with “text” icon (look for the big “A”) on the tools panel on the left side. You can use your image as a cut file and send to the Silhouette Came to create projects with vinyl or paper.
To make a print, you will need to fill the outlined image in with color. Select the paint palette from the tools panel on the right side and you fill the image with color. In this case, I chose to use black since I will be printing the image out on my laser printer to be foiled. Select the palette icon on the left side toolbar to play around with all the different fill options.
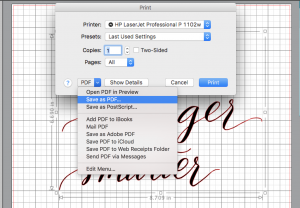
Step 5: Converting your file to a PDF
Finally, export the whole file as a PDF by going to the print function and saving it as a PDF.
Once the PDF is saved, you now have an easily reproducible file that can be printed over and over again. You can now make and sell prints of your designs.

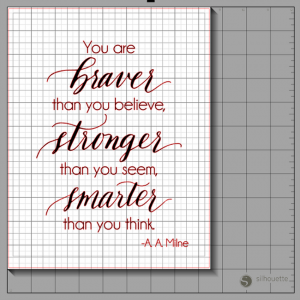
The print above shows a quote I found from A. A. Milne (the creator of Winnie the Pooh) that I printed and foiled it as a gift for a coworker. I used rose gold foil and put it in a pretty gold frame as a gift for a friend. For a tutorial on how to DIY your own foil prints, check out my post here.

I’d love to see what projects you guys develop from digitizing your own hand lettering!

No Comments