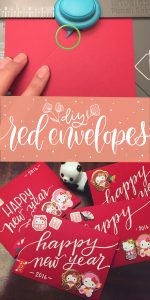
This is what happens when you invite a friend over for a random craft session on a Thursday night. We were planning on making Valentine’s Day cards but we realized that Chinese New Year was right around the corner so why not make some red envelopes also known as “hong bao” in Mandarin.
So what are red envelopes? In Chinese and other Asian cultures that follow the lunar calendar, this year’s New Year Day falls on February 9th. In our culture, we give red envelopes with money inside as gifts wishing the receipient a year of good fortune and to “ward of evil spirits”. Usually these envelopes are given from married couples to children and elders along with words of good fortune and health.
And since I got married back in 2014…. I guess I have some red envelopes to make and pass out!
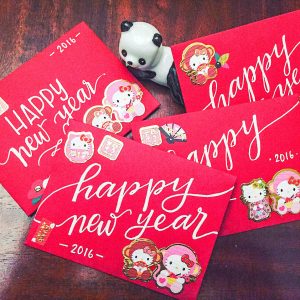
I was inspired by stamping guru MamaElephant. Check out the cute red envelope ideas here. I was too late this year to get the stamps in time but I’m going to be sure to use them next year! Thankfully, I picked up some cute stickers this past December on a trip to Tokyo but you can find cute stickers online by searching for what lunar year animal it is.
What you’ll need:
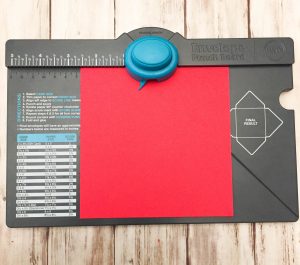
- We R Memory Keepers envelope punch board
- Red card stock 5.5″ x 5.5″ or larger
- Stamps or decorative stickers
- Tombow permanent adhesive tape
- Uniball Signo white gel pen
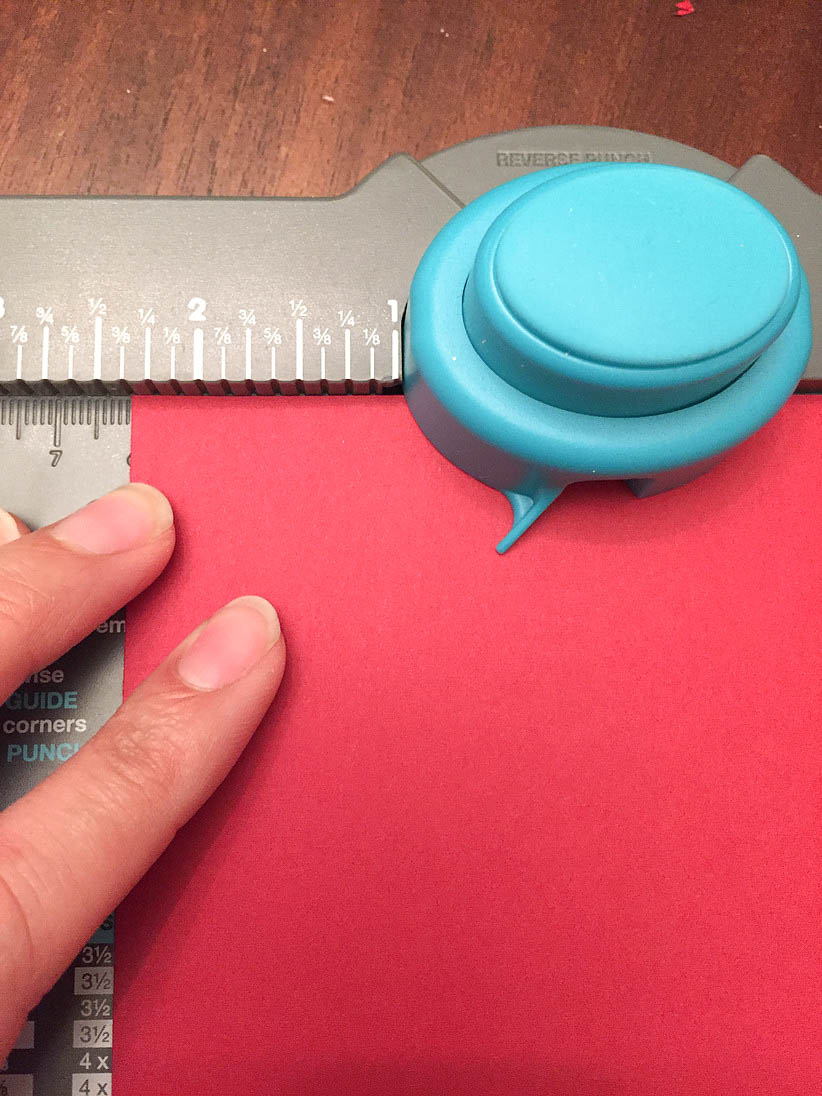
Step 1: Cut paper down to size
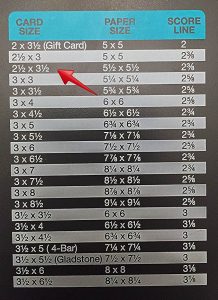
The directions for how to create your custom envelopes are printed pretty clearly on the envelope board itself. First, you want to select your card size. I chose the 2.5″ x 3.5″ size envelope so that a dollar bill folded in half could easily fit inside. you need to learn how to read the I used my Fiskar’s paper trimmer to cut the 12″ x 12″ card stock down to 5.5″ x 5.5″ pieces. The envelope punch board makes it super easy to create your own envelopes, especially if you want an envelope in a non-standard or hard to find size.
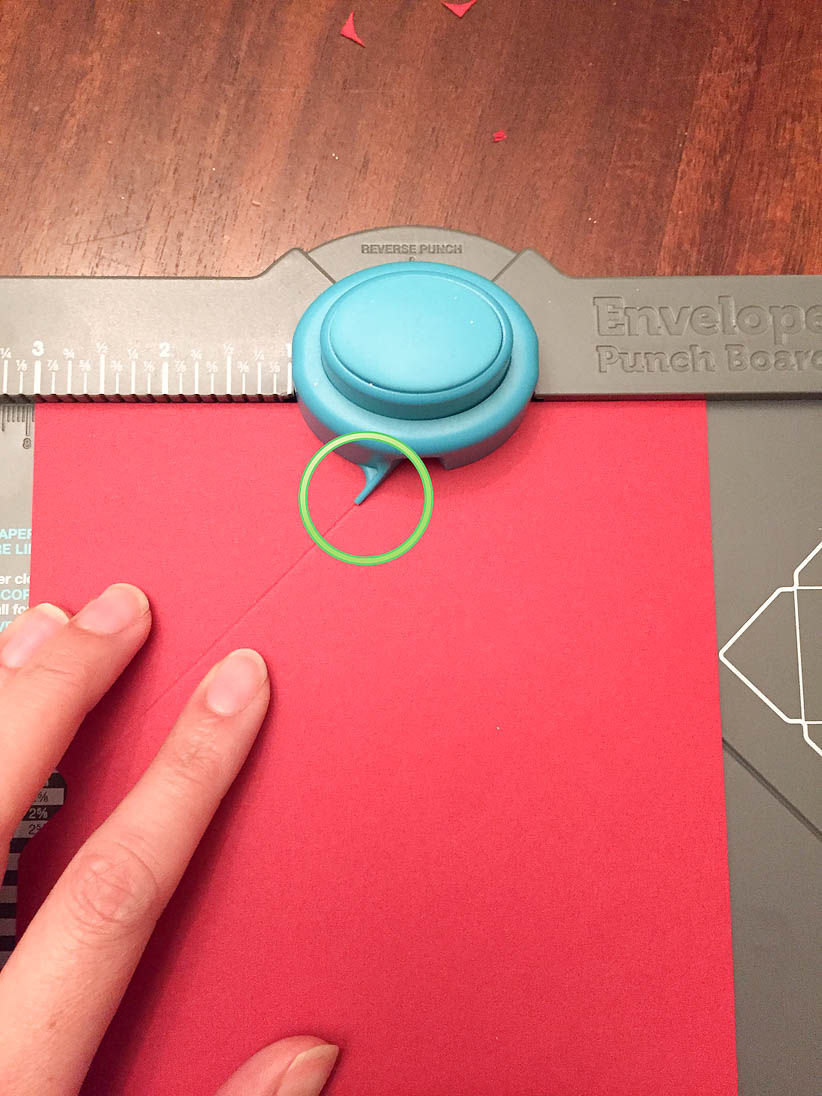
Step 2: Begin punching and scoring
Use the measuring guide to line up your paper at the right measurement to begin scoring your fold marks. There is a bone folder conveniently hidden inside the envelope punch board on the right hand side. For the project, the score line will be at 2 and 3/8″.
Use the score line to determine where your first punch is. Line the edge of your cut card stock to the 2 and 3/8″ mark, push down on the punch and then use the bone folder to score the first fold.
Then you rotate your paper 90 degrees to line the previous score line with your score guide (the little blue guide sticking out of the punch). Repeat the process of punching and scoring until all 4 sides of the envelope are punched and scored.
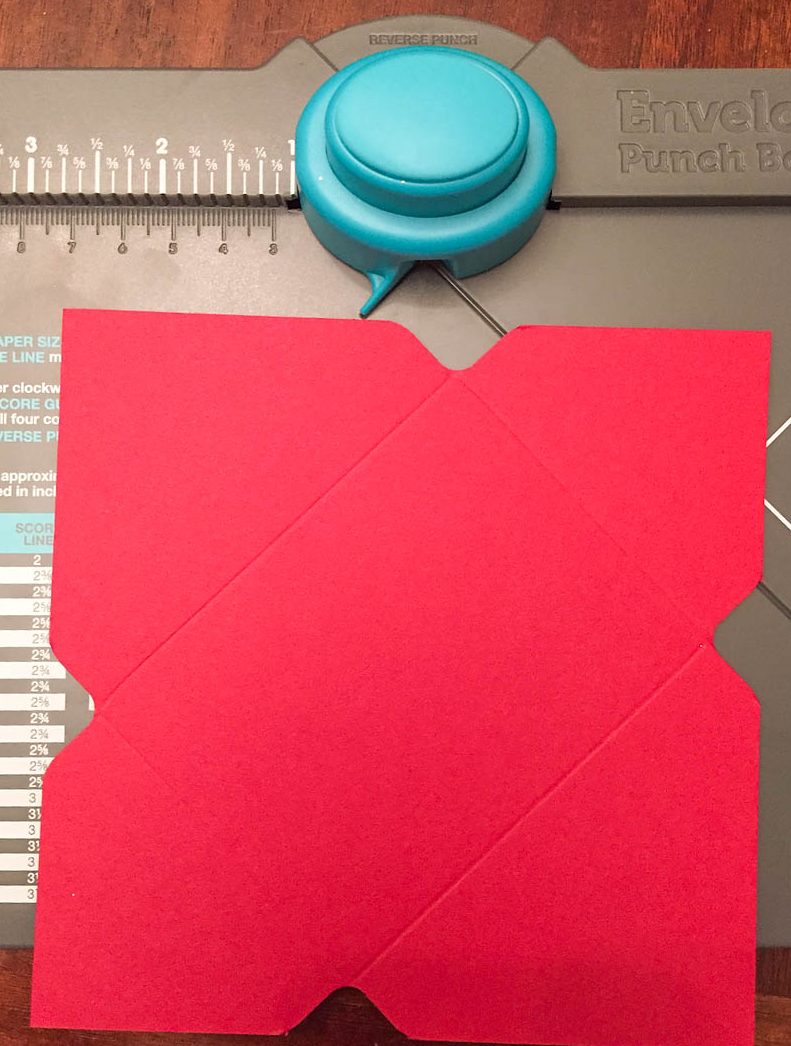
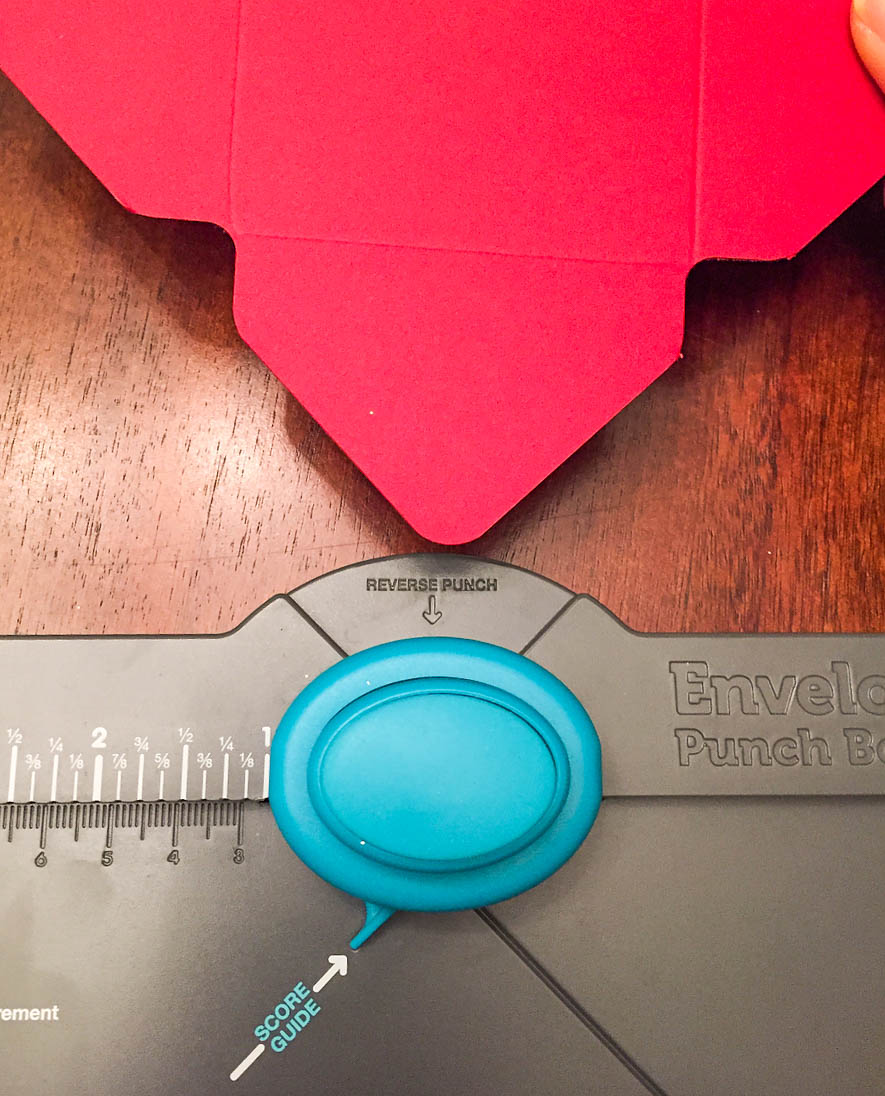
Step 3: Round the edges of the envelope
Now that you have the basic shape of your envelope scored and cut, you want to finish the envelope by rounding the corners. To do this, you place the corners into the opposite side of the punch and push down. This will round all the corners of the envelopes.
Step 4: Decorating your envelopes
Now comes the fun part! Sticker to your heart’s delight! I used a white gel pen to do some faux calligraphy and write “Happy New Year” on all my envelopes. My favorite white gel pen is the Uni-Ball Signo White Gel Pen. I wrote the words first in cursive and filled in the downstrokes with thicker lines.
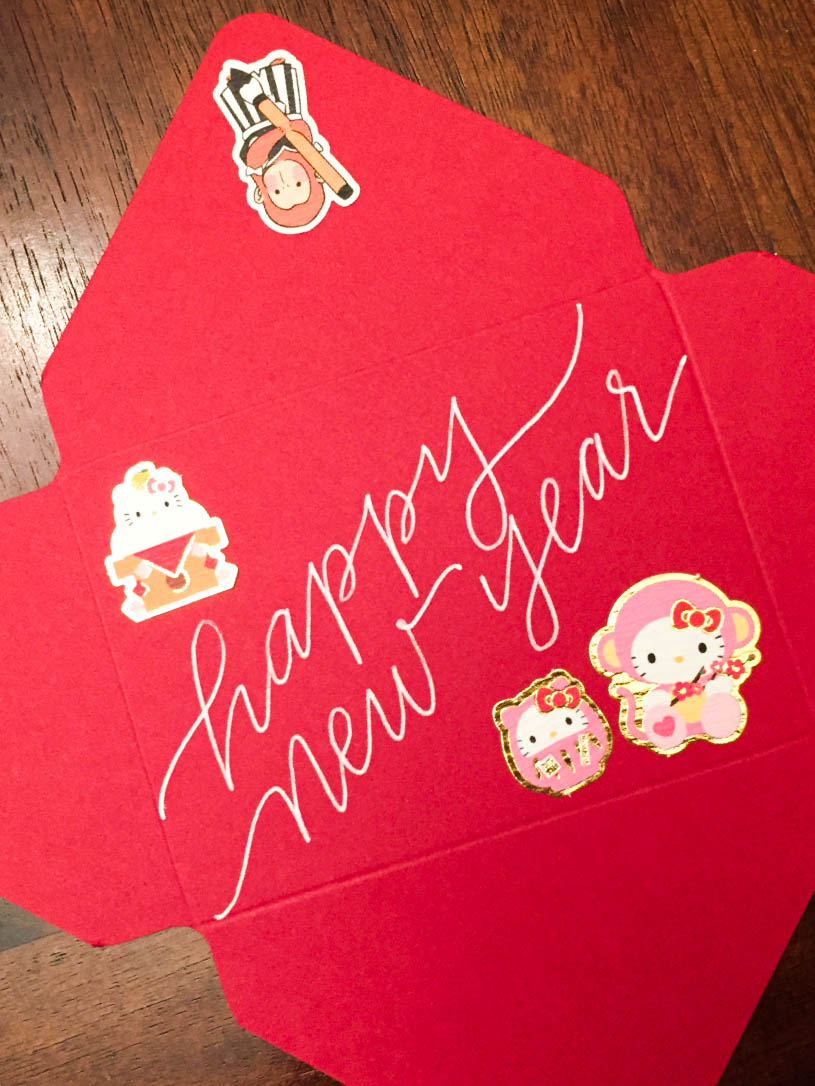
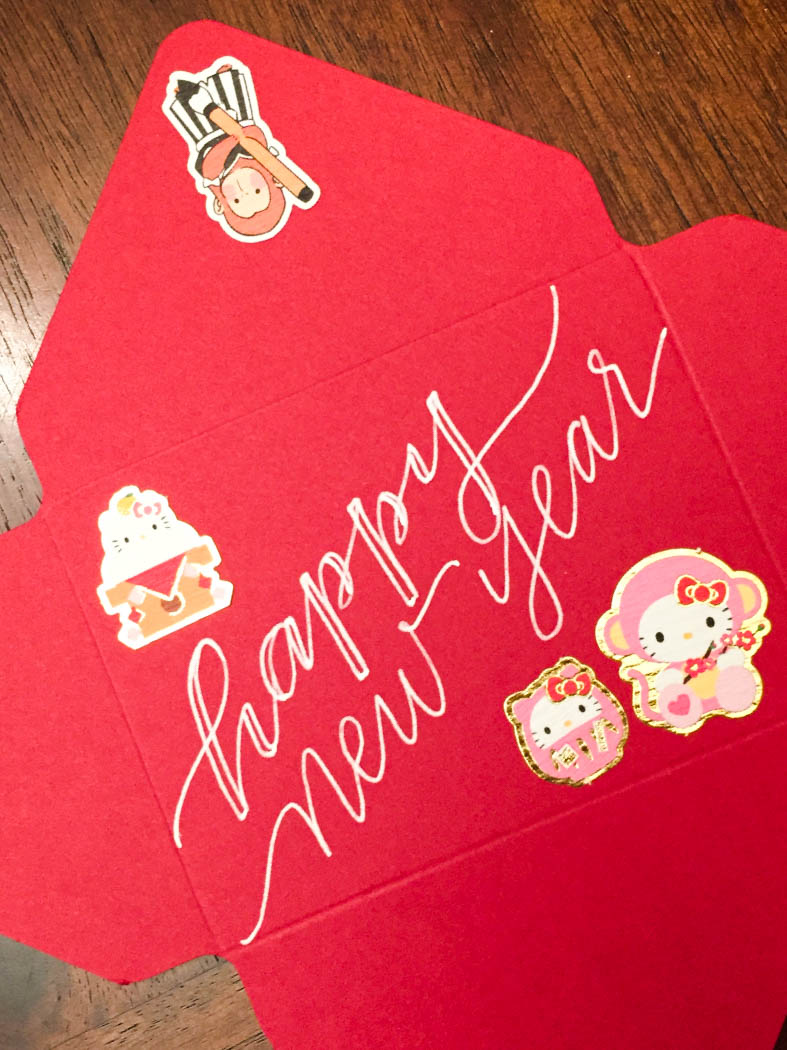
Don’t forget to work from the top down and be careful not to smudge (…like I did). This ink takes a while to dry because it comes out so thick, which is what gives it such an opaque white color, but makes it hard for impatient people like me!
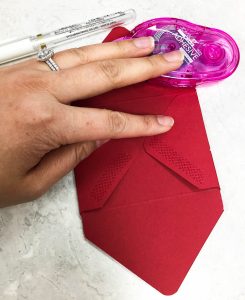
Step 5: Taping your envelope together
Using the Tombow permanent adhesive tape makes sticking the edges of the envelope so much easier than gluing.Glue the bottom fold of the envelope to the two flaps on the left and right. Be careful to make note of area to be covered so you don’t have exposed adhesive later.
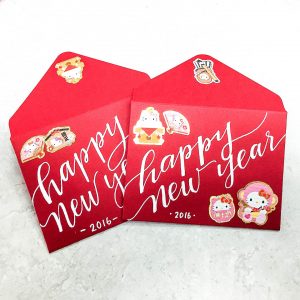
Stuff some money in these little envelopes and they are good to go! The envelopes are meant to wish younger ones with a year of good fortunes ahead. Wishing everyone out there a happy, prosperous, and healthy New Year!

Let me know if you guys try making your own envelopes!
No Comments